Everything You Need to Know about Women You Learned from Aladdin

Having problems courting your princess? You obviously didn’t pay close enough attention to the Disney animated film Aladdin. Re-watch it, or watch it for the first time, and take notes. Because everything you need to know about what a woman wants, you can learn from Aladdin.

341554

But first, a brief synopsis. Jasmine, the raven-haired Sultan’s daughter, is on a time crunch. It is three days before her sixteenth birthday and the law states she must be married to a prince by that time. She has turned away suitor after suitor, disliking the stuffy-headed, pompous princes that have come to call on her. She decides, of course, to run away and finally see something outside the palace walls.

Unaccustomed to “normal” life, Jasmine gets herself into trouble for giving an apple to a hungry little boy. Accused of stealing, she is about to get her arm cut off when (enter Aladdin, the street rat, diamond in the rough) saves her. He shows her around town until she is found by the guards and taken back to the palace.

Long story short, Aladdin happens upon a magic lamp with a genie inside who has to give him three wishes. He wishes to be a prince so he can marry Jasmine. Some things don’t work out so well, mostly due to an evil sorcerer, Jafar. But in the end, Aladdin and Jasmine end up marrying after the sultan changes the law to state that the princess can marry whomever she deems worthy. An action that would have saved a lot of heartache and distress in the first place, but hey, then there wouldn’t be a movie.

So what do we learn from Aladdin? First off, women do not like pompous show-offs. All the suitors Jasmine turned down tried to impress her with their wealth and good looks. Yes, Aladdin had some skills up his sleeve too, but they came out when the moment was appropriate. So stop walking up to girls in bars and trying to impress them with how much you can lift, your high-paying promotion, or how many celebrities you know. Maybe you can lift a lot, maybe you do make a lot of money, and maybe you have a lot of important colleagues. But all of these things send up red flags that say “pompous ass.” And none of them tell a girl who you really are.

Secondly, women are curious about what they can’t have. Jasmine is supposed to marry a prince, so naturally she is drawn to the street savvy diamond in the rough. Women want to see “a whole new world” or learn something new. They want to be taken out somewhere different. Be creative with dates. Flashy or expensive is not always the way to go. The best dates are well thought out and actually mean something or show her something about what you like to do or who you are.

Thirdly, Women DO NOT like to be deceived, lied to, or manipulated. This will likely make them very angry. Not so much because you lied, but more because of what it says you think of them. If you think you can get away with something, you are telling the woman you think she is stupid, or incapable of figuring things out.

Lastly, BE YOURSELF. You can only fake for so long, and sooner or later the real you will have to come out. Chances are, she liked the real you to begin with, so why change? If you try to change your basic personality you risk losing her because she fell in love with you. 

Of, course a magic carpet (or fast car) never hurts.

And never forget, a girl’s best friend will always be her cat (or dog).


3 Beauty Routines You’re Not Spending Enough Time on Today That Will Save You Time and Money Tomorrow

beautyritual

I know, it’s late and you’ve had a long day at work, in school, or out with friends, and the last thing you want to do is spend a lot of time taking off your makeup and washing your face. You might be debating just going to bed with your makeup on and worrying about it tomorrow. It’s so tempting, right? Raise your hand if this has never happened to you. I’m guessing there aren’t very many hands shooting up right now. The truth is, spending a little extra TLC on your face right now will not only make you prettier tomorrow, it will help your skin stay healthy and radiant for years to come.

How many products have you seen (and probably purchased) that promised you a more radiant complexion? Less tired eyes? A healthy looking glow? I’m not trying to knock any of these products. In fact, a have several, and I love how they work. But these products, especially the really good ones, come with a price tag; sometimes a pretty hefty one. The solution: have naturally radiant, glowing skin. “But I don’t have that kind of skin!” you say. True, not every one is blessed with the radiance of Jennifer Lopez, and those “healthy glow” products do help. But the secret to healthy looking skin is simple: have healthy skin.

You don’t need any scientific studies to prove to you that when you don’t wash your face at night, your skin looks a little dull and not very vibrant the next morning. If you have not experienced this, you are probably sixteen (and trust me it is coming!) or you are genetically blessed. For the rest of us, a good washing before bed will slough off dead skin cells and the rest of the ick the day has put on our skin. You have been washing your face for years so you don’t need a tutorial, right? Well, that may not be true. Do you know long you typically spend washing your face? I’ll give you a hint, it’s probably not long enough.

After receiving a facial at a local skin care salon, I asked my technician, Kathy, how I could keep my face looking facial fresh longer. Kathy worked with a plastic surgeon before opening up her own business. She offers chemical peels, microdermabrasions, facials, and other skin treatments. I thought she was going to try to sell me some special product, or tell me to get weekly facials. Instead she said something that surprised me. “Really make sure you are washing your face correctly,” she said. Correctly? I thought. How can you do it incorrectly? It seems pretty straight forward.

Her tips for an expert face wash: dampen your face with warm (not too hot) water to open up the pores. Apply your face wash to your face using clean fingers.  Using a product with salicylic acid or fruit acid in it will help remove dead skin cells. Here comes the part we tend to rush. Really spend time massaging the face wash into your skin, creating a nice lather in a circular motion. Spend a good three minutes making sure your get into your hairline and all the way to your ears. Rinse off and pat your face dry with a clean towel.

When you are walking in the door at 2 am and see your fluffy pillow calling you, the last thing you want to do is spend time washing your face. But time spent now means healthier looking skin tomorrow, and possibly using less product to fake a healthy glow in the morning.


Another routine that seems pretty straight forward? Brushing your teeth. We probably all know to brush at least two times a day, not to press too hard, and to spend at least one to two minutes on each of our brushing sessions to maintain pearly whites. Teeth whitening fanatics will tell you to stay away from dark colored sodas and other teeth staining substances like coffee and red wine. But we all know that isn’t happening! According to DentalHealthMed.com, Americans spend over 1.3 billion dollars a year on teeth whitening products. Although a white smile looks like a healthy smile, that may not always be the case. The surest way to make sure your mouth is healthy is to visit your dentist regularly. At-home whitening strips or in office treatments are not only costly, they don’t do anything to help fight cavities, or keep your teeth, gums, and mouth healthy. I’m not suggesting you over brush, but adding an extra brush after drinking red wine or coffee could help prevent stains in the first place while preventing cavities and plaque. Spending a few extra minutes a day brushing after consuming teeth staining substances can save you a lot of money on those whitening products.


Sunscreen. It feels kinda thick on our skin, takes forever to put on, and wears off too quickly. But it is the one beauty ritual you can put extra time into that could save your life, in addition to preventing wrinkles, age spots, and premature aging. Most of us do not use sunscreen properly. Buying SPF 70 does not mean that you can apply it at 10 am and stay out until 5 pm without reapplying. And buying SPF 8 so you can “get a tan” is not protecting your skin from aging or from skin cancer. And you lovely, dark skinned beauties who don’t burn? Yes, you too need sunscreen. Just because you don’t burn doesn’t mean you are not receiving the harmful effects of the sun’s rays. So if you want your skin to stay beautiful well into your 60s and beyond, and you want to avoid having to burn off cancerous skin cells, the Skin Cancer Foundation recommends applying one ounce (about a shot glass full) of sunscreen every two hours, or immediately after swimming or toweling off. In addition, you must apply sunscreen about thirty minutes prior to sun exposure, according to the Foundation. That means do not bring your sunscreen with you and apply it on the beach (unless of course you are reapplying it). Reapplying is just as important as applying in the first place.

UVB rays are the culprit behind getting a sunburn, whereas UVA rays, because they penetrate deeper, are associated with the skin damage that causes aging. This is why you must use a sunscreen that protects against both kinds of rays. Getting a sunburn is only the skin’s reaction to UVB rays and tells you nothing about the UVA damage you may be receiving. This is why people who don’t burn still need to apply sunscreen. According to the Skin Cancer Foundation, anything under SPF15 is not protecting you enough from the damaging effects of UVA rays, even if it protects you from getting burnt.  Spending a little extra time slathering on before you spend time outside (even if you are only going to be out for an hour and it’s cloudy) can save you money on all of those anti-aging products you won’t need because you took care of your skin from the start. And hey, it could even save your life.

When Opposites Attract

There is a time and a place for matchy-matchy. This is not it. Sometimes there is nothing wrong with a little tulle with your leather, a little converse with your dress, or a little high heel with your deconstructed denim.


IMG_0327PS

IMG_0358PS

|skirt: self-made| |shoes: converse| |sweater: J.Crew| |jewelry: kate spade| |bag: kate spade (similar here)| |sunglasses: kate spade|


motocycle&tutu

|shoes: Ivanka Trump| |skirt: self-made| |jacket: Harley Davidson via Poshmark| |sunglasses: Ray-Ban|


photoredshoesPS


photoredshoesagain

|sweater: Lou & Grey| |denim cutoffs: Free People| |bag: Rebecca Minkoff via Poshmark| |sunglasses: Rebecca Minkoff via Poshmark| |necklace: Ann Taylor via Poshmark| |shoes: Aminah Abdul Jillil|


In Mint Condition

I have always loved the taste of mint. It tingles on the tongue and invigorates the senses, creating a fresh feeling all over. Whether you are wearing it or eating it, mint’s cool, crisp vibes are like a fresh breeze on a hot summer day. Perhaps this is why I have fallen in love with adding mints and light blues to my wardrobe when the heat starts to rise. Use mint as a pick-me-up on days when you crave that fresh, cool feeling. Here are some ways to incorporate the color into your wardrobe.

Pair mint accessories with an all neutral palette. Here I chose whites and creams as my base with mint and light blue accents.

IMG_0051PS
IMG_0089PS


IMG_0056PSIMG_0092PS

|jewelry: J. Crew| |watch: Marc by Marc Jacobs| |shoes: Pour La Victoire (also love these)| |clutch: J. Crew| |sunglasses: kate spade| |nails: Essie polish in Mint Candy Apple| |clothes from Ann Taylor Loft|


If your summer uniform consists of cutoff denim shorts and a white shirt, liven up your look by opting for mint colored denim.

mintshort2PS copy

IMG_0129PS

IMG_0117PS copy

IMG_0122PSAdd orange accessories for a little more pop. Here I chose an orange lip and necklace which contrast nicely with the cool mint tones.

|jewelry: J. Crew| |shorts: Forever 21| |shoes: Ted Baker| |watch: Marc by Marc Jacobs| nails: Essie polish in Mint Candy Apple| |sunglasses: kate spade| |sweater: Lou & Grey Ann Taylor Loft| |bag: Rebecca Minkoff|


If you describe your style as flirty and girly, or sweet and feminine, opt for a full skirt paired with a mint top.

IMG_0214PSIMG_0281PS


IMG_0221PS|skirt: self-made| |shoes: Pour La Victoire| |bag: kate spade (similar here) | |necklace: kate spade| |sunglasses: kate spade| |ring: kate spade| |sweater: J. Crew|


Want to ditch your black and white work wear but not sure how to incorporate color and still look professional? Mint is bright enough to spice up your black and white, but won’t seem too bold for the office.

IMG_0173PSmintskirtandnailsPS

Elongate your lines by pairing mint heels with a mint pencil skirt. By keeping the color going all the way down to your feet, you will avoid cutting up your leg line.

|skirt: J. Crew| |top: Anthropologie| |shoes: BCBGeneration| |nails: Essie polish in Mint Candy Apple| |watch: Marc by Marc Jacobs| |necklace: J. Crew| |sunglasses: kate spade|

Love Summer Whites, But Hate Yellow Pits?

Let’s be honest, we all have a lovely white top or dress somewhere in our closet with a not-so-lovely yellow discoloration under the arms. And let’s be honest, I have way more yellow-armed shirts in my closet than I care to admit. While it may be easy to toss out that old ratty T with the yellow armpits, there are other items that make me cringe to think about tossing out. I fully admit I have put on a top with discolored underarms and thought, “If I just don’t raise my arms the whole night it will be fine, right?”

image-5

After pretreating, washing, pretreating, washing, and so on, I began to think I was going to either have to live with yellow pits, or grit my teeth and toss out all of those discolored whites. But after some research, trial and error, and tweaking others’ recipes, I found a concoction that finally took the yellow out. And the best part, is all the ingredients were already in my house, and probably in yours too. I’m proudly raising my arms, and I just can’t keep what I learned to myself. So if you have shirts that look like this:

(And this isn’t even close to my worst one! This was just the only one I took a picture of for demonstration)

image-3

then read on for how you can save your whites.

The stains on my shirts are what you would call “set in” stains. Washed and dried several times. I used my technique on cotton (like the shirt above), linen, and silk. My underarm yellow remover worked best on the 100% cotton shirt. It came out right away. The linen sweater was a little more difficult, and the silk was the most difficult because of its delicate nature. But all three shirts came out white in the end. I also successfully used my technique on a dark colored shirt that had salt rings under the arms.

I’m not going to get too in depth on the chemistry behind a yellow pit stain, but there are a few things you should know about why these stains are just so darn stubborn. First off, they are more like discolorations than stains. Unlike dirt, wine spills, and grass stains, for example, that turn your clothes the color of the stain, yellow underarms aren’t from your sweat secreting yellow color (thank God because that would be pretty gross). Your shirts’ underarms turn yellow due to a chemical reaction. This reaction is more difficult to reverse than a typical stain, and thus pretreating and washing is not enough. This is also the reason bleaching your underarms turns them an even worse mustard color yellow. The bleach reacts with your underarm chemicals and minerals to make the stain even worse, even though it fixes other stains on your whites.

Sweat stains are slightly different than the mixture of sweat and deodorant. If you wear deodorant, the yellow under your arms is likely the chemical reaction of the deodorant AND sweat. Ring around the collar, or yellow discoloration elsewhere is most likely due to the chemical reaction of your sweat with the fabric. Sweat stains are slightly easier to remove than the deodorant/sweat combo, but both are just as unsightly and can be removed with this technique.

You will need:

  • Baking Soda
  • Hydrogen Peroxide
  • Liquid Laundry Detergent (preferably a clear one)
  • Warm Water
  • Cup and spoon
  • Your fingers

Spread out the underarm area of your shirt so you can see the full stain. If you have more than one shirt to do like I did, mix 4 Tablespoons of baking soda with 1/4 cup of warm water. If you only have one shirt, you can use less. The mixture is simply equal parts baking soda to warm water.

Stir well. It’s going to seem a bit soupy at first but trust me, it thickens fast. Spoon the mixture onto the underarm and rub it into the fabric well with your fingers. It will start to thicken as you rub. Add more and rub until you have a nice coating covering the discolored area.

Repeat on the other underarm and let sit for about 15-30 minutes. Don’t throw out your mixture.

Come back with your hydrogen peroxide and liquid laundry detergent. I suggest using a clear one because you don’t really need to be adding more color to your underarms. And because we are going to put the detergent directly on the stain, it is gong to be pretty concentrated (way more so than when you put it in a load of wash).

Mix equal parts peroxide and detergent (you can use the same cup as before, even if it has leftover baking soda in it). I used one Tablespoon of each. You are going to rejuvenate the mixture on the underarms by spooning the new concoction over the old and mixing it in with your fingers. The cakey baking soda mixture should become a thick liquid again. Let this new concoction sit for about 15-30 minutes.

When you come back after patiently waiting, don’t be tempted to try to see if it worked yet. You need that nice coating to stay on there. Put the clothes in the wash, but not with another load. They need to be all by themselves. I know it isn’t the most environmentally savvy procedure, but if you do a few shirts at a time it isn’t so bad. Add detergent and wash with warm water if the fabric allows for it. My machine has a “quick wash” setting that is significantly shorter than a typical wash, so I used that.

When the wash cycle is finished take out your shirts and examine the underarms. If they are to your liking, proceed as usual with a dry cycle or hang dry. If they are still a little yellow (like most of mine), repeat the process but on the INSIDE of the underarm.

At first glance it may seem like a lengthy and tedious process. But it’s inexpensive and gets your underarms looking like this:

image-1


image-2

That’s all the motivation I need to use this method over and over again.

image-4

Happy de-yellowing! Go ahead and raise your arms up all summer long. I know I will be.

image-7

Shown here is a linen summer weight sweater that I treated with my concoction. |sweater: J.Crew (old)| |jeans: Banana Republic (accidentally deconstructed)| |shoes: Steve Madden via Poshmark| |necklace: Ann Taylor Loft| |sunglasses: Marc by Marc Jacobs via Poshmark|


If You Want Something, Do It Yourself

We have all heard from someone, “If you want something done right, you have to do it yourself.”  With limited editions and pricey designer duds, sometimes if we want something at all, we will just have to make it ourselves. This is the story of how a non-sewer created a DIY skirt.

Since the moment I spotted this Tibi skirt on Blair Eadie of Atlantic-Pacific, I knew I had to get my hands on one. The fullness, the length, and that COLOR! But the bright red SOLD OUT text on every site haunted my dreams, as did the $525 price tag. The only way I was going to get my hands on a skirt like that was to make it myself. I love DIY projects, so no problem! Except I know even less than the basics of sewing, and I have used a sewing machine a total of maybe one time. But you never learn if you don’t start, right?

So for those of you who sew, I apologize in advance for my lack of “proper” technique and terms. This one is going out to the newbies as proof that there IS hope of creating a DIY skirt with little or no experience.

Below is Blair Eadie of Atlantic-Pacific in her Tibi Skirt. Read on for how I made a similar version with very little sewing experience.

Image

What you will need:

  • a large ruler or yard stick
  • something to make a pattern (I used computer paper taped together)
  • About 3 yards of fabric (to get fullness I chose a thick material like taffeta. You can use any material you like, but the stiffer the fabric, the more volume you will get from the skirt)
  • thread matching the color of your fabric
  • scissors
  • sewing machine
  • needle
  • pins
  • invisible zipper (preferably in a matching color, but because it is invisible, a close color will work too. I used a cream colored one, which was the best option I could find).
  • eye and hook closure
  • patience
  • possibly a glass of wine (but keep it away from the skirt!!)

One benefit of making your own skirt is you can make it exactly the size and length you want. So first, you are going to measure your waist (or the place you want the waist band of your skirt to be). Then you are going to measure how long you want your skirt to be. I wanted mine to fall below my knees like the Tibi version. That’s about 28″ long on me. For this skirt, I allowed for a four inch hem. The pattern of this skirt is a rectangle that gets gathered at the waist to create a gathered, full skirt. So you are going to want the rectangle’s width to be about two to three times the length of your waist, and the height of the rectangle to be your desired length plus four inches. For example, if your waist is 30″ and you want the length of your skirt to be 28″ long, you are going to need a rectangle that is at least 60″ x 32″. For more fullness, I would suggest more like 75″ x 32″.

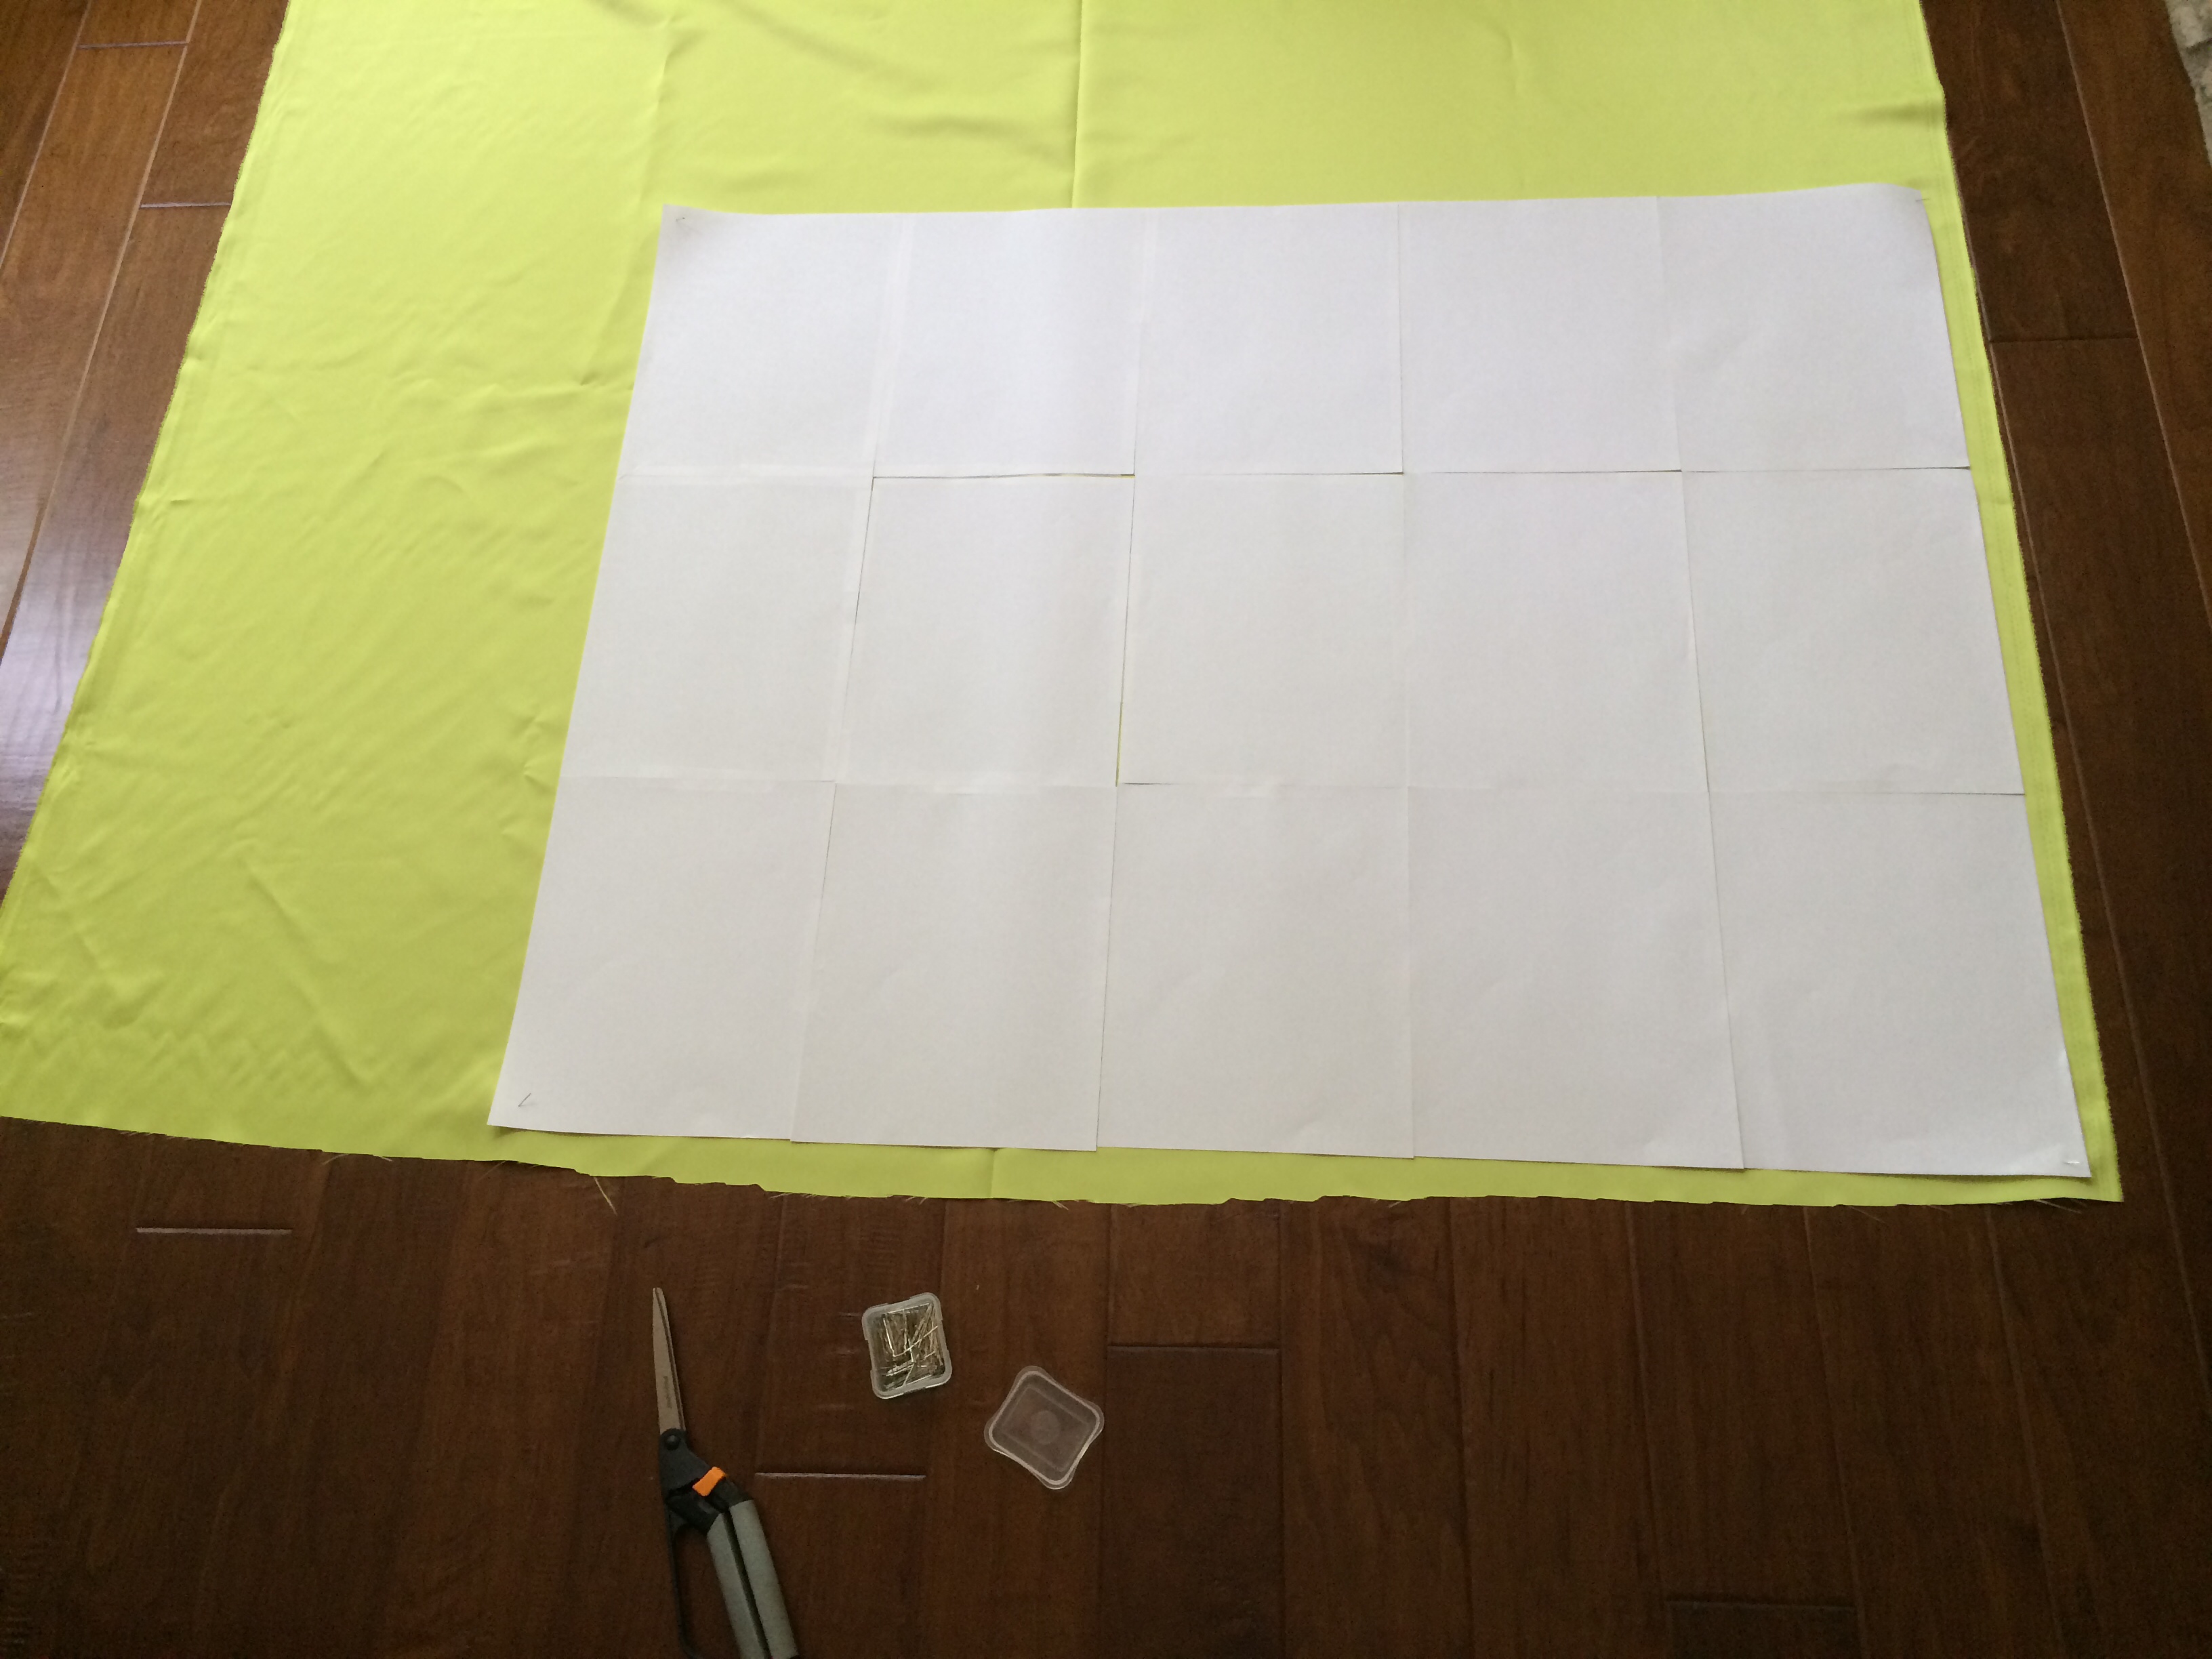
Now we need a pattern. I taped computer paper together like this:

Image

Image

Now measure and cut your pattern to your desired size. I made my pattern so that the height was my desired length plus four inches. I wanted my skirt to have two seams on either side so I could insert pockets, so I made the width HALF of my total desired width which was 2.5 times my waist measurement. So for a 30″ waist with a desired length of 28″, the pattern will be about 38″ x 32″.

Take your piece of fabric and lay it down making sure it is nice and smooth. You may need to iron it first. Pin the pattern to your fabric, and cut just outside the line of the pattern (for seam allowances). To avoid heartache later, always make sure you measure twice and cut once. I like to double check my measurements about four times before I cut. If there is one thing you want to redo, it’s measuring, NOT ripping out seams and resewing, or running back to the store for more fabric.

Image

After you cut, you will have the front of your skirt. Now it’s time to cut out the pattern again for the back of your skirt.

If you have a serger and know how to use it, you can serge your edges now to prevent fraying. Otherwise just ignore that statement and we will continue.

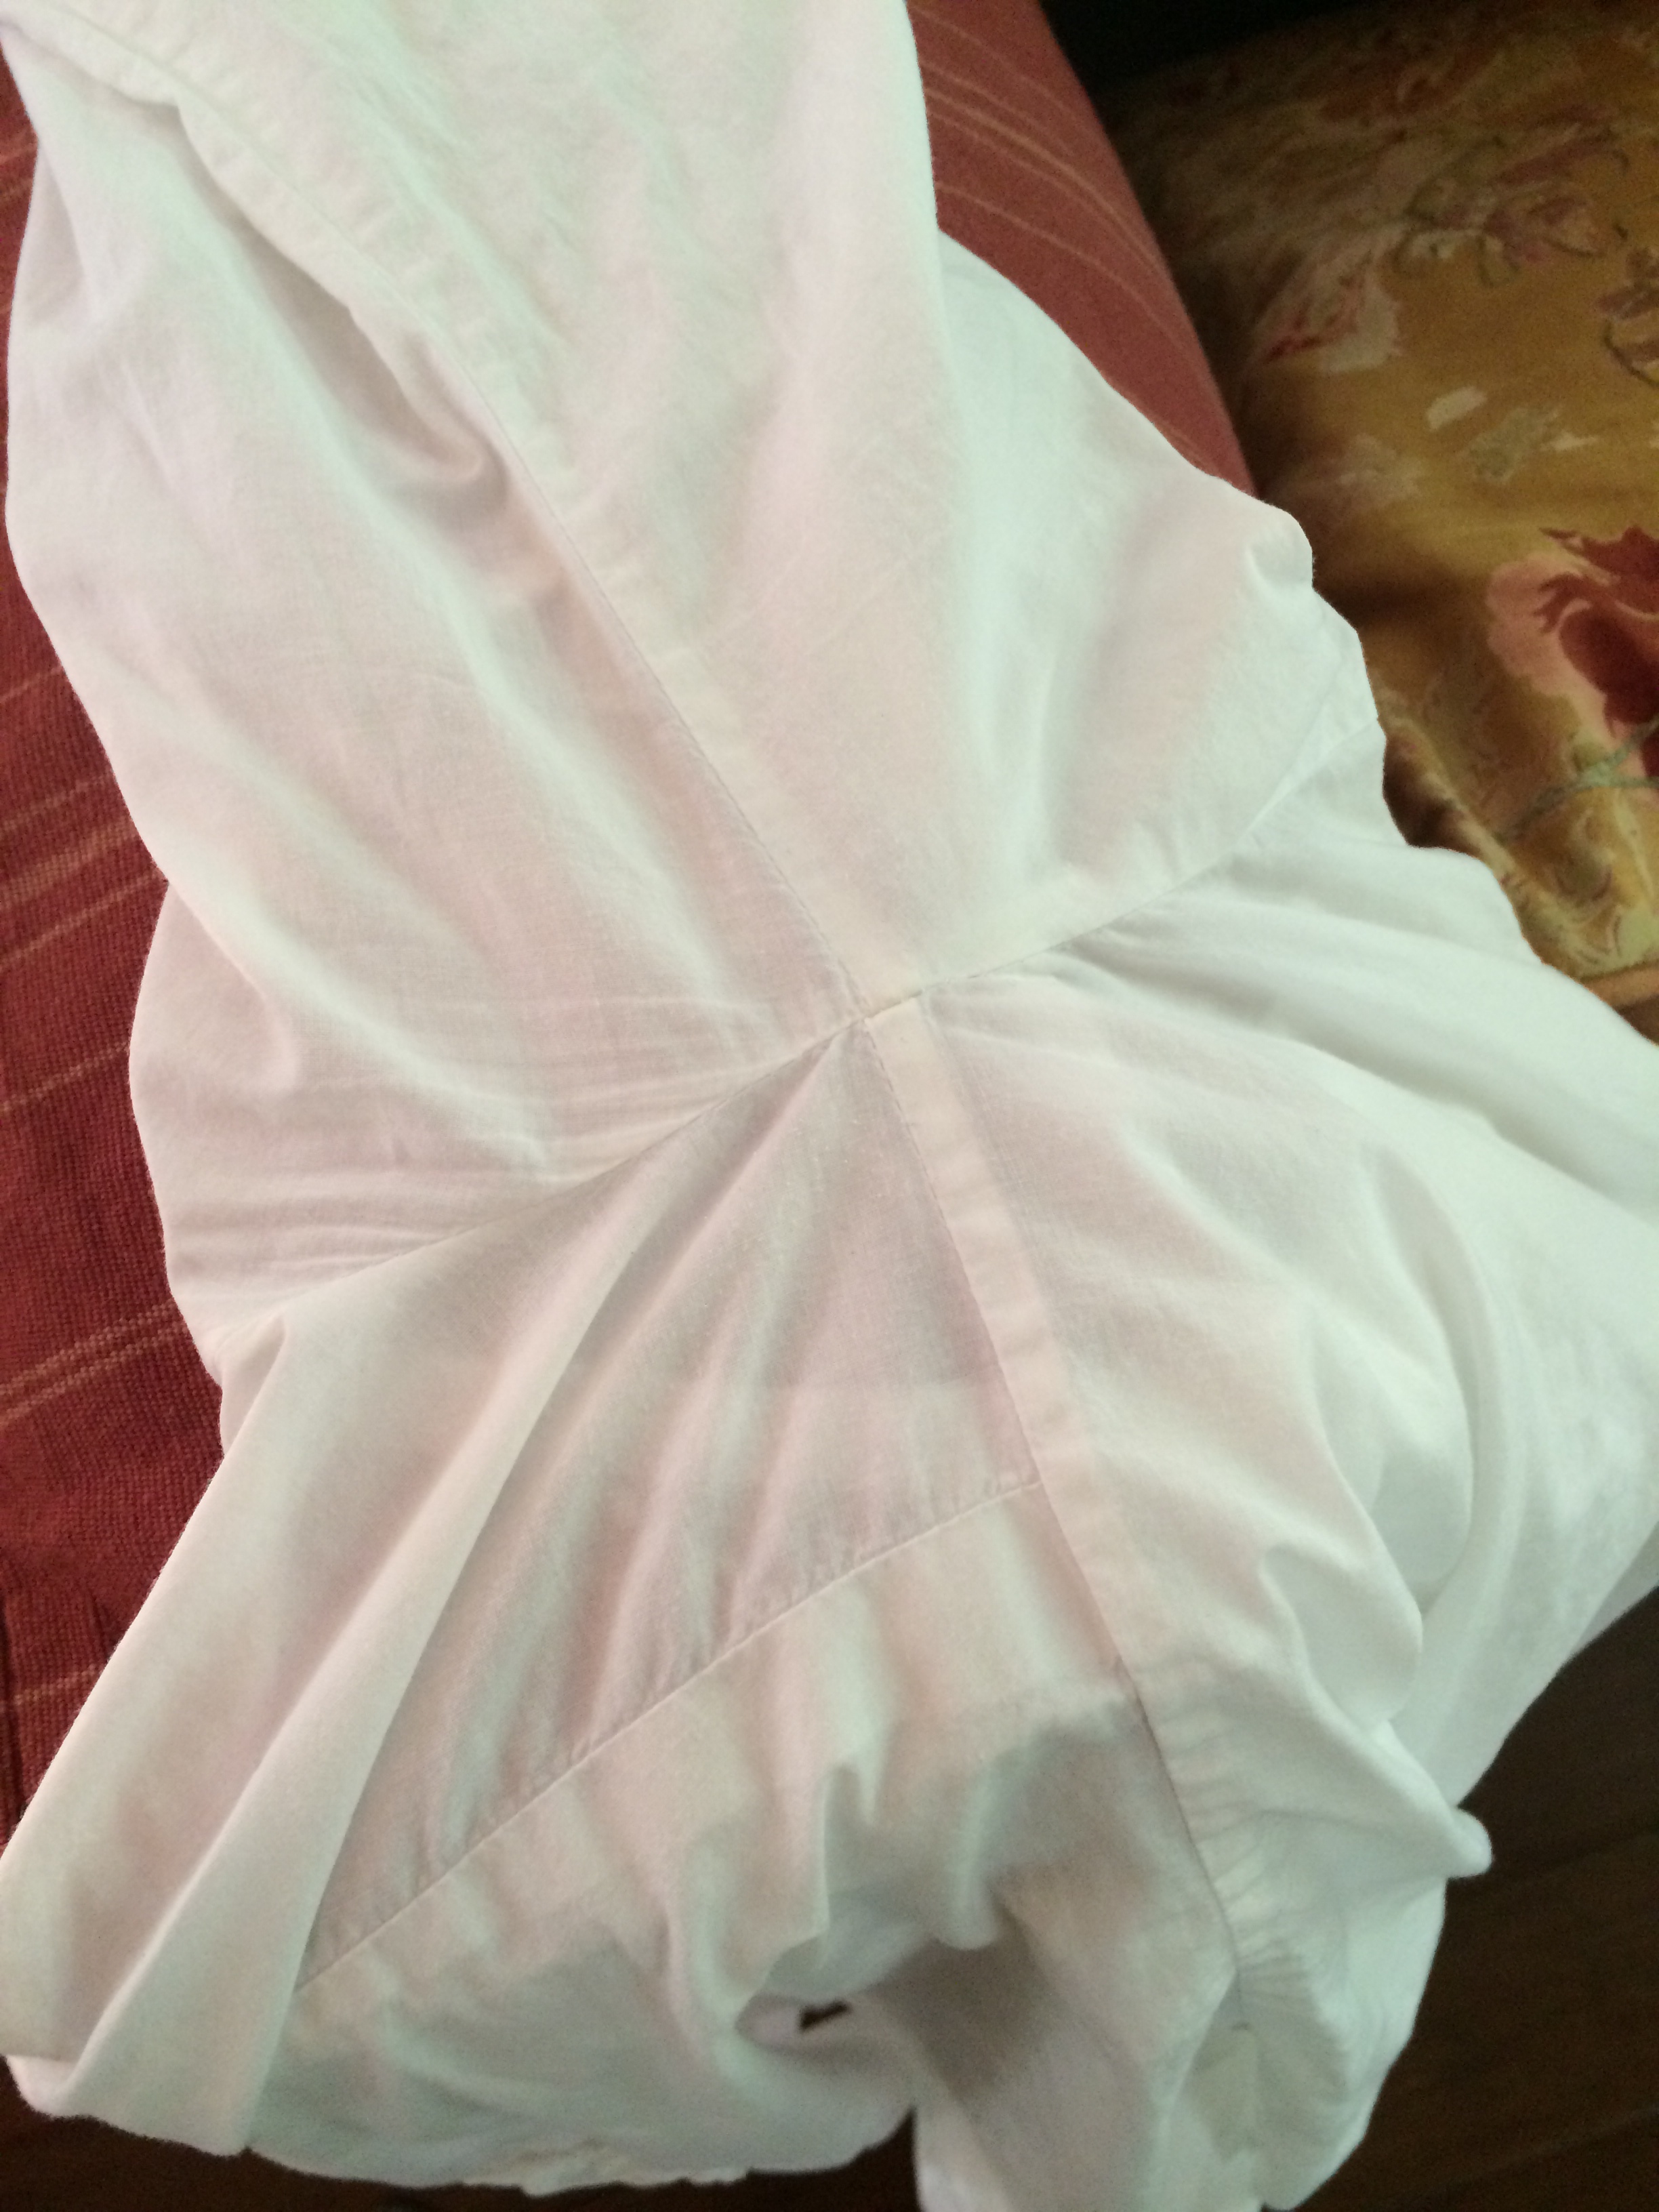
It is time to take your two pieces of fabric and head over to the sewing machine. Place your pieces of fabric with the “correct” sides facing each other, and the backsides facing outward. Pin along the sides of the skirt (what will be the waist should be at the top). Now sew the sides of the skirt, making sure you backstitch on both ends to secure the stitch. You should now have the front and back of the skirt sewn together at what will be the sides of your skirt. Now to gather your waist.

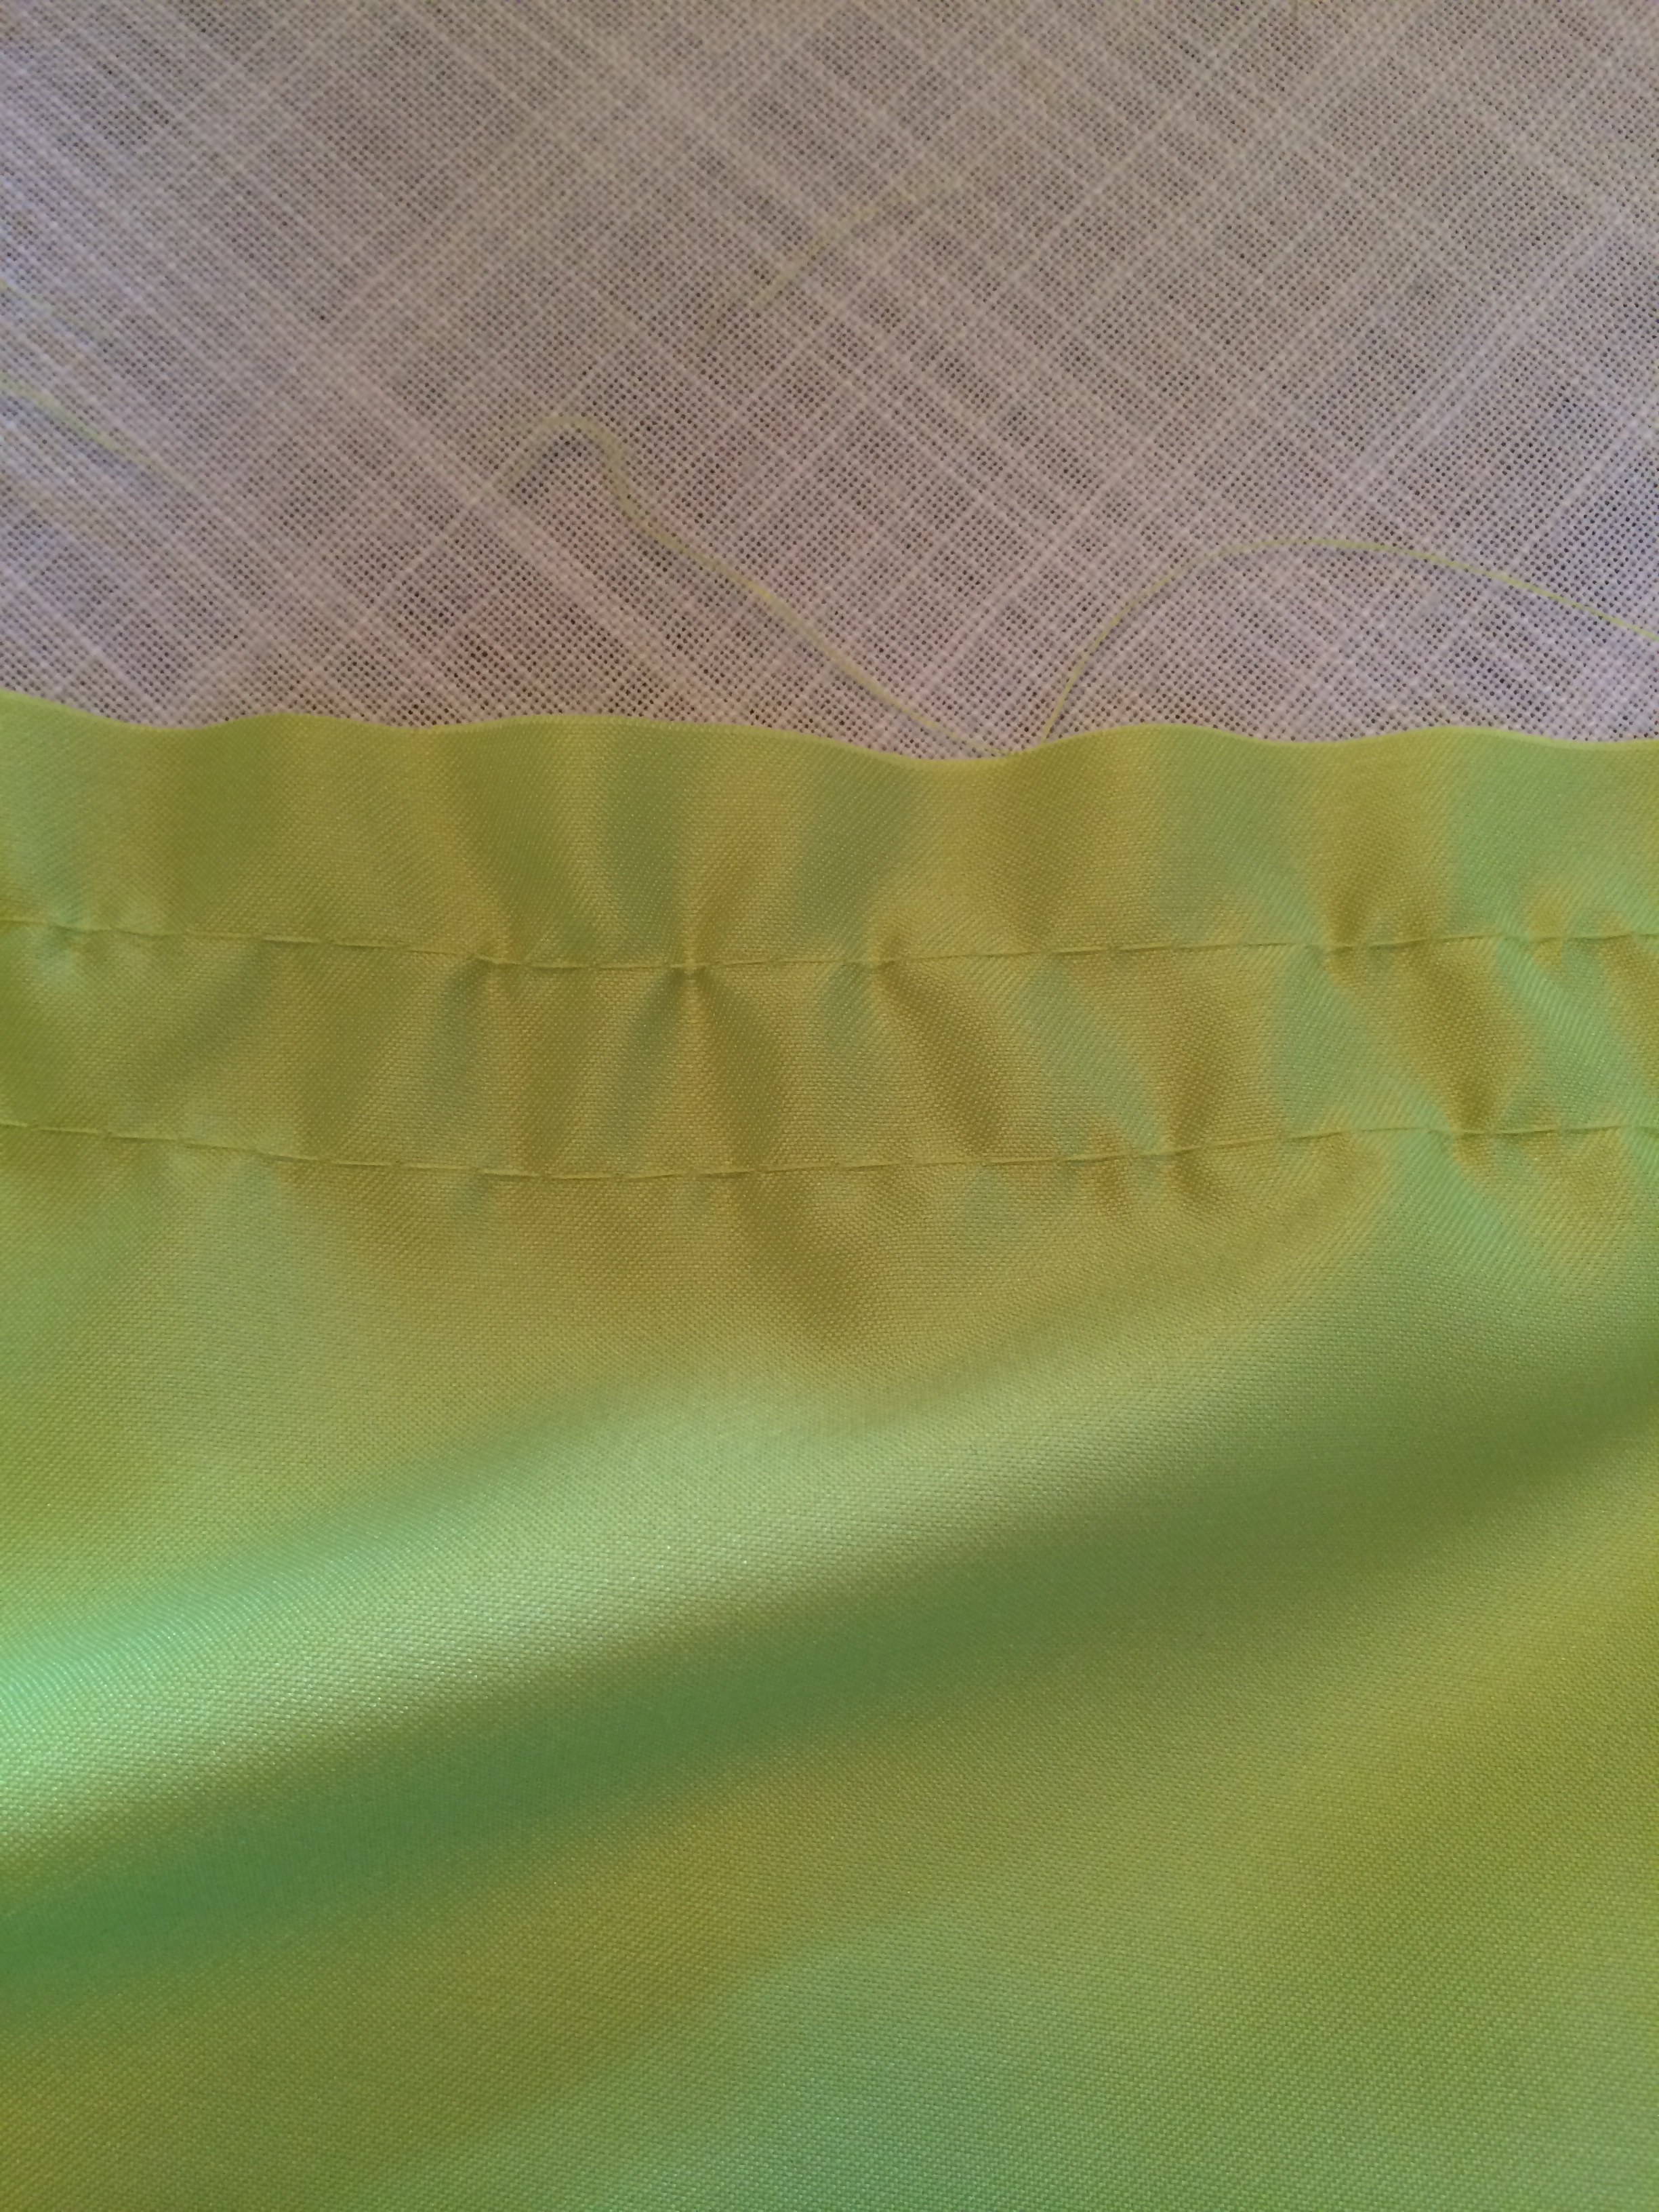
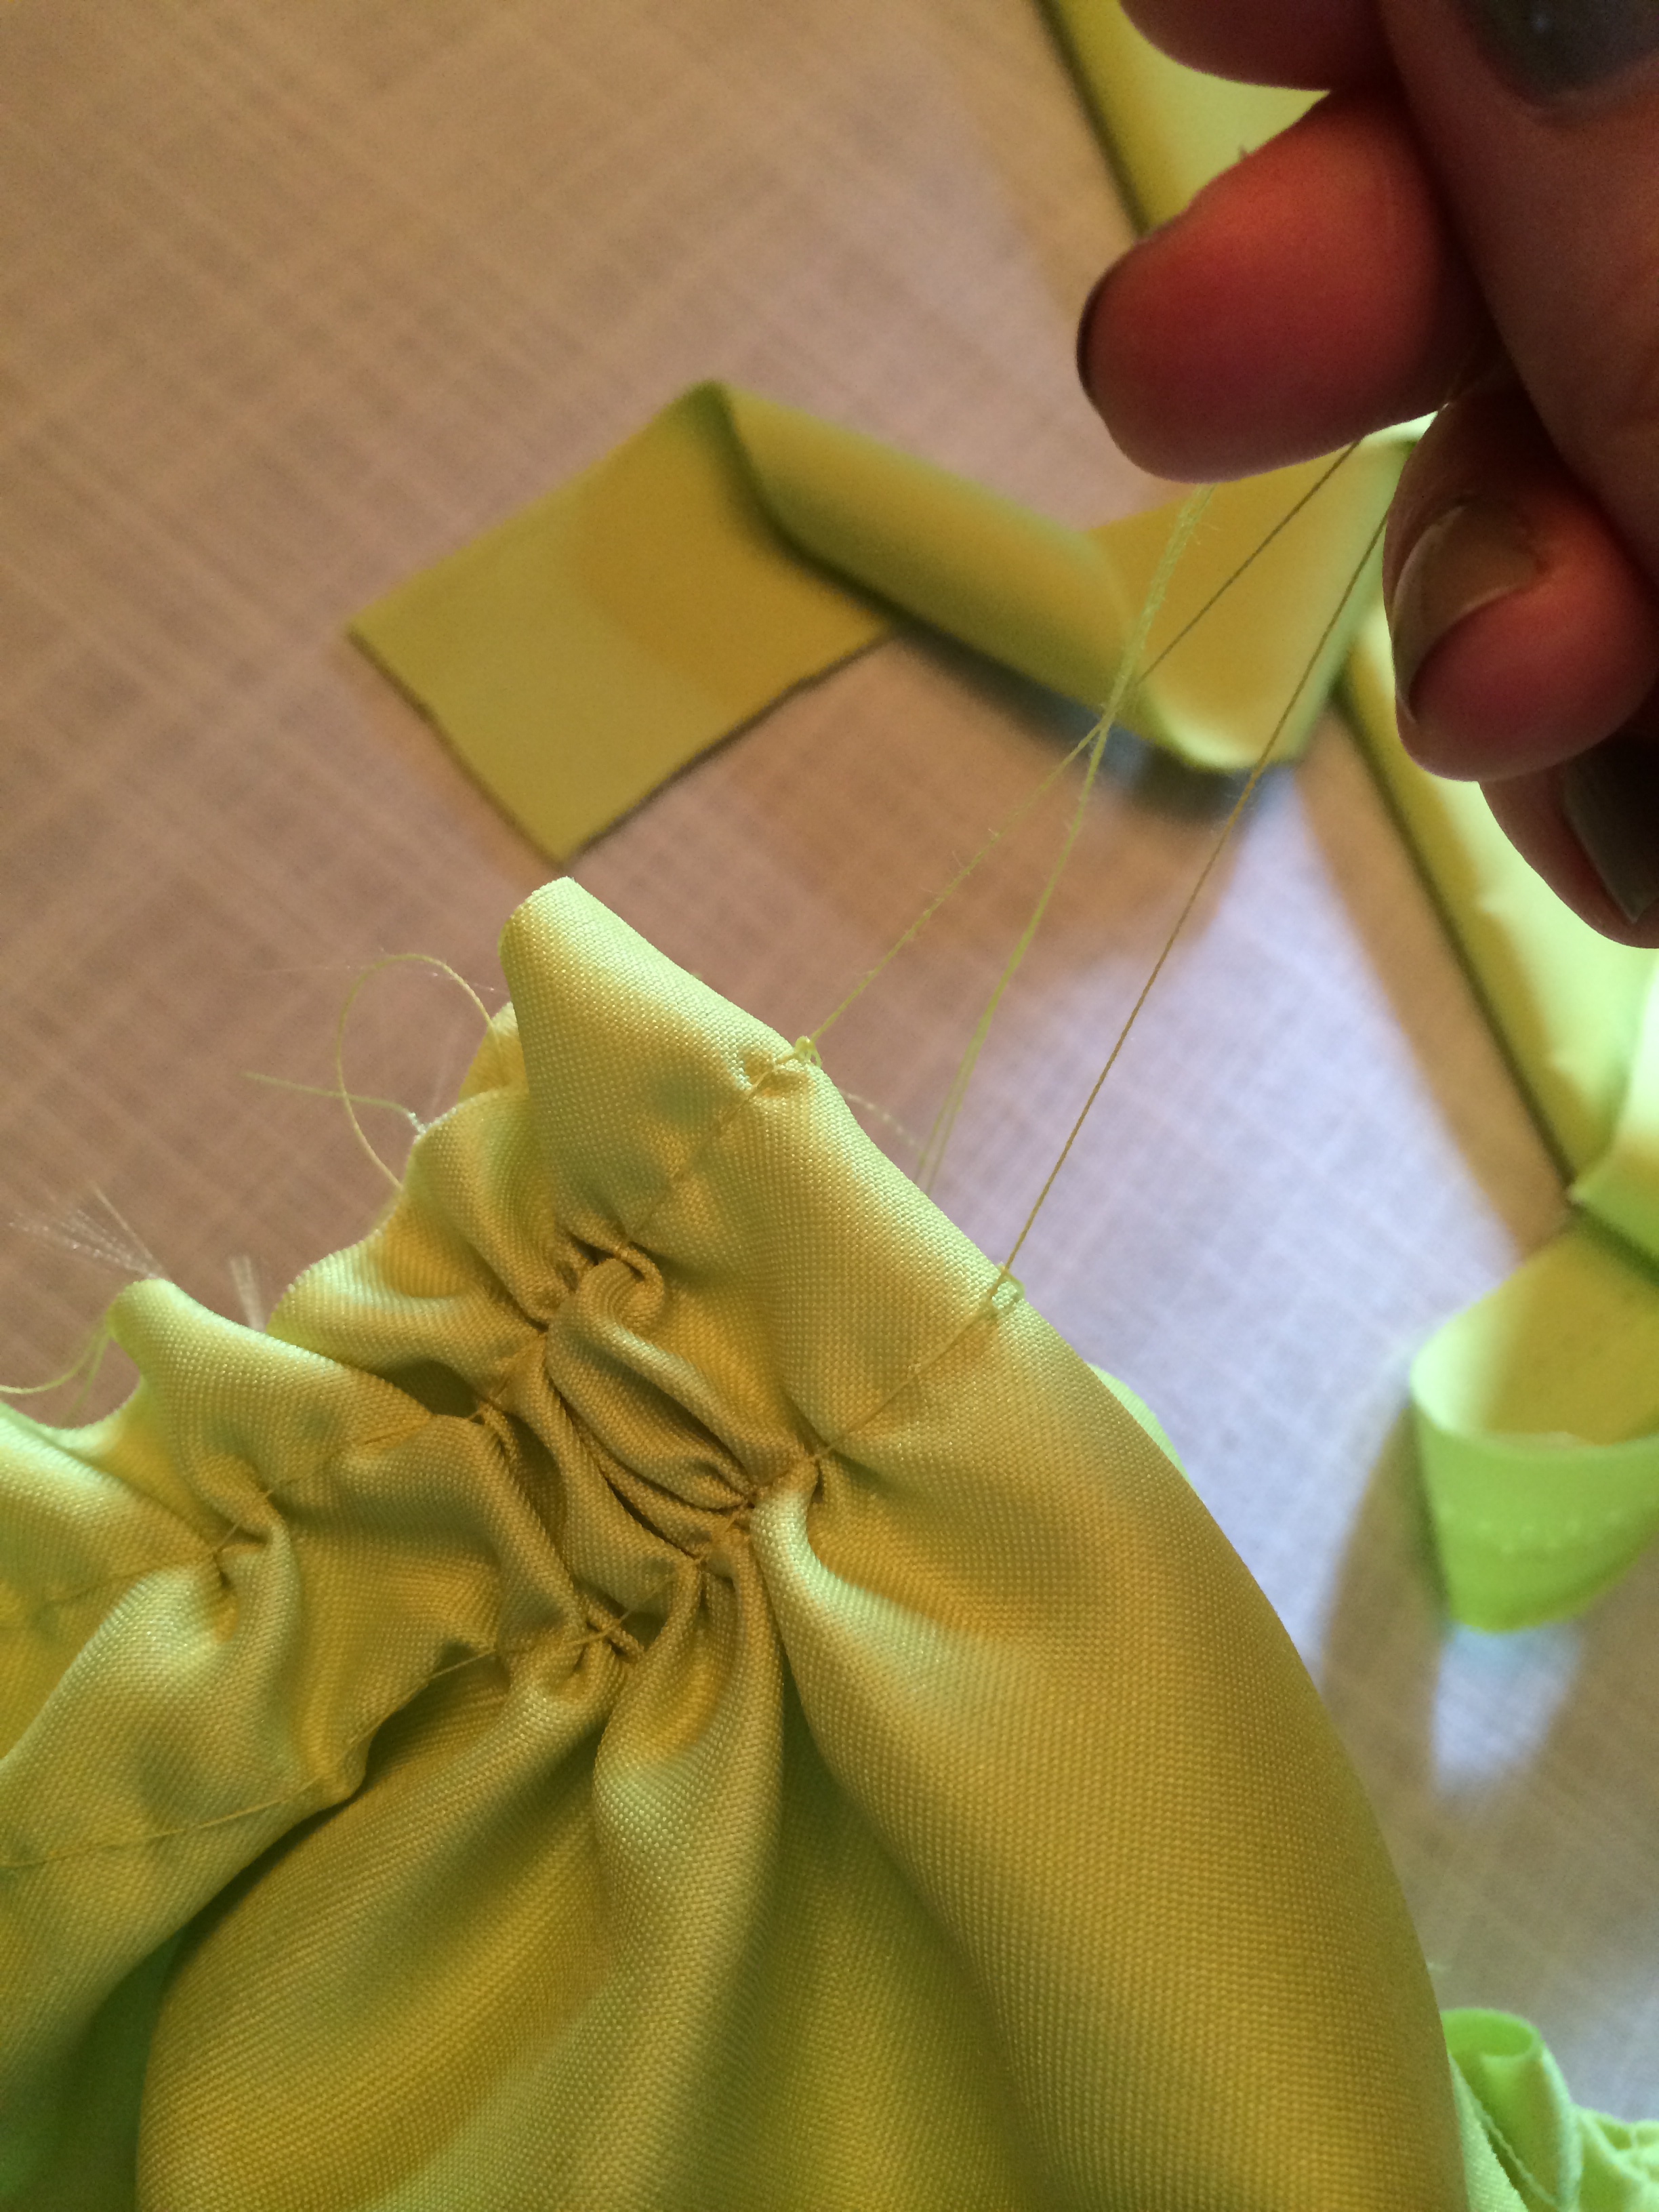
I like to do the front half and back half separately. To gather, make two rows of long stitches near the top of your fabric. It will look something like this…

Image

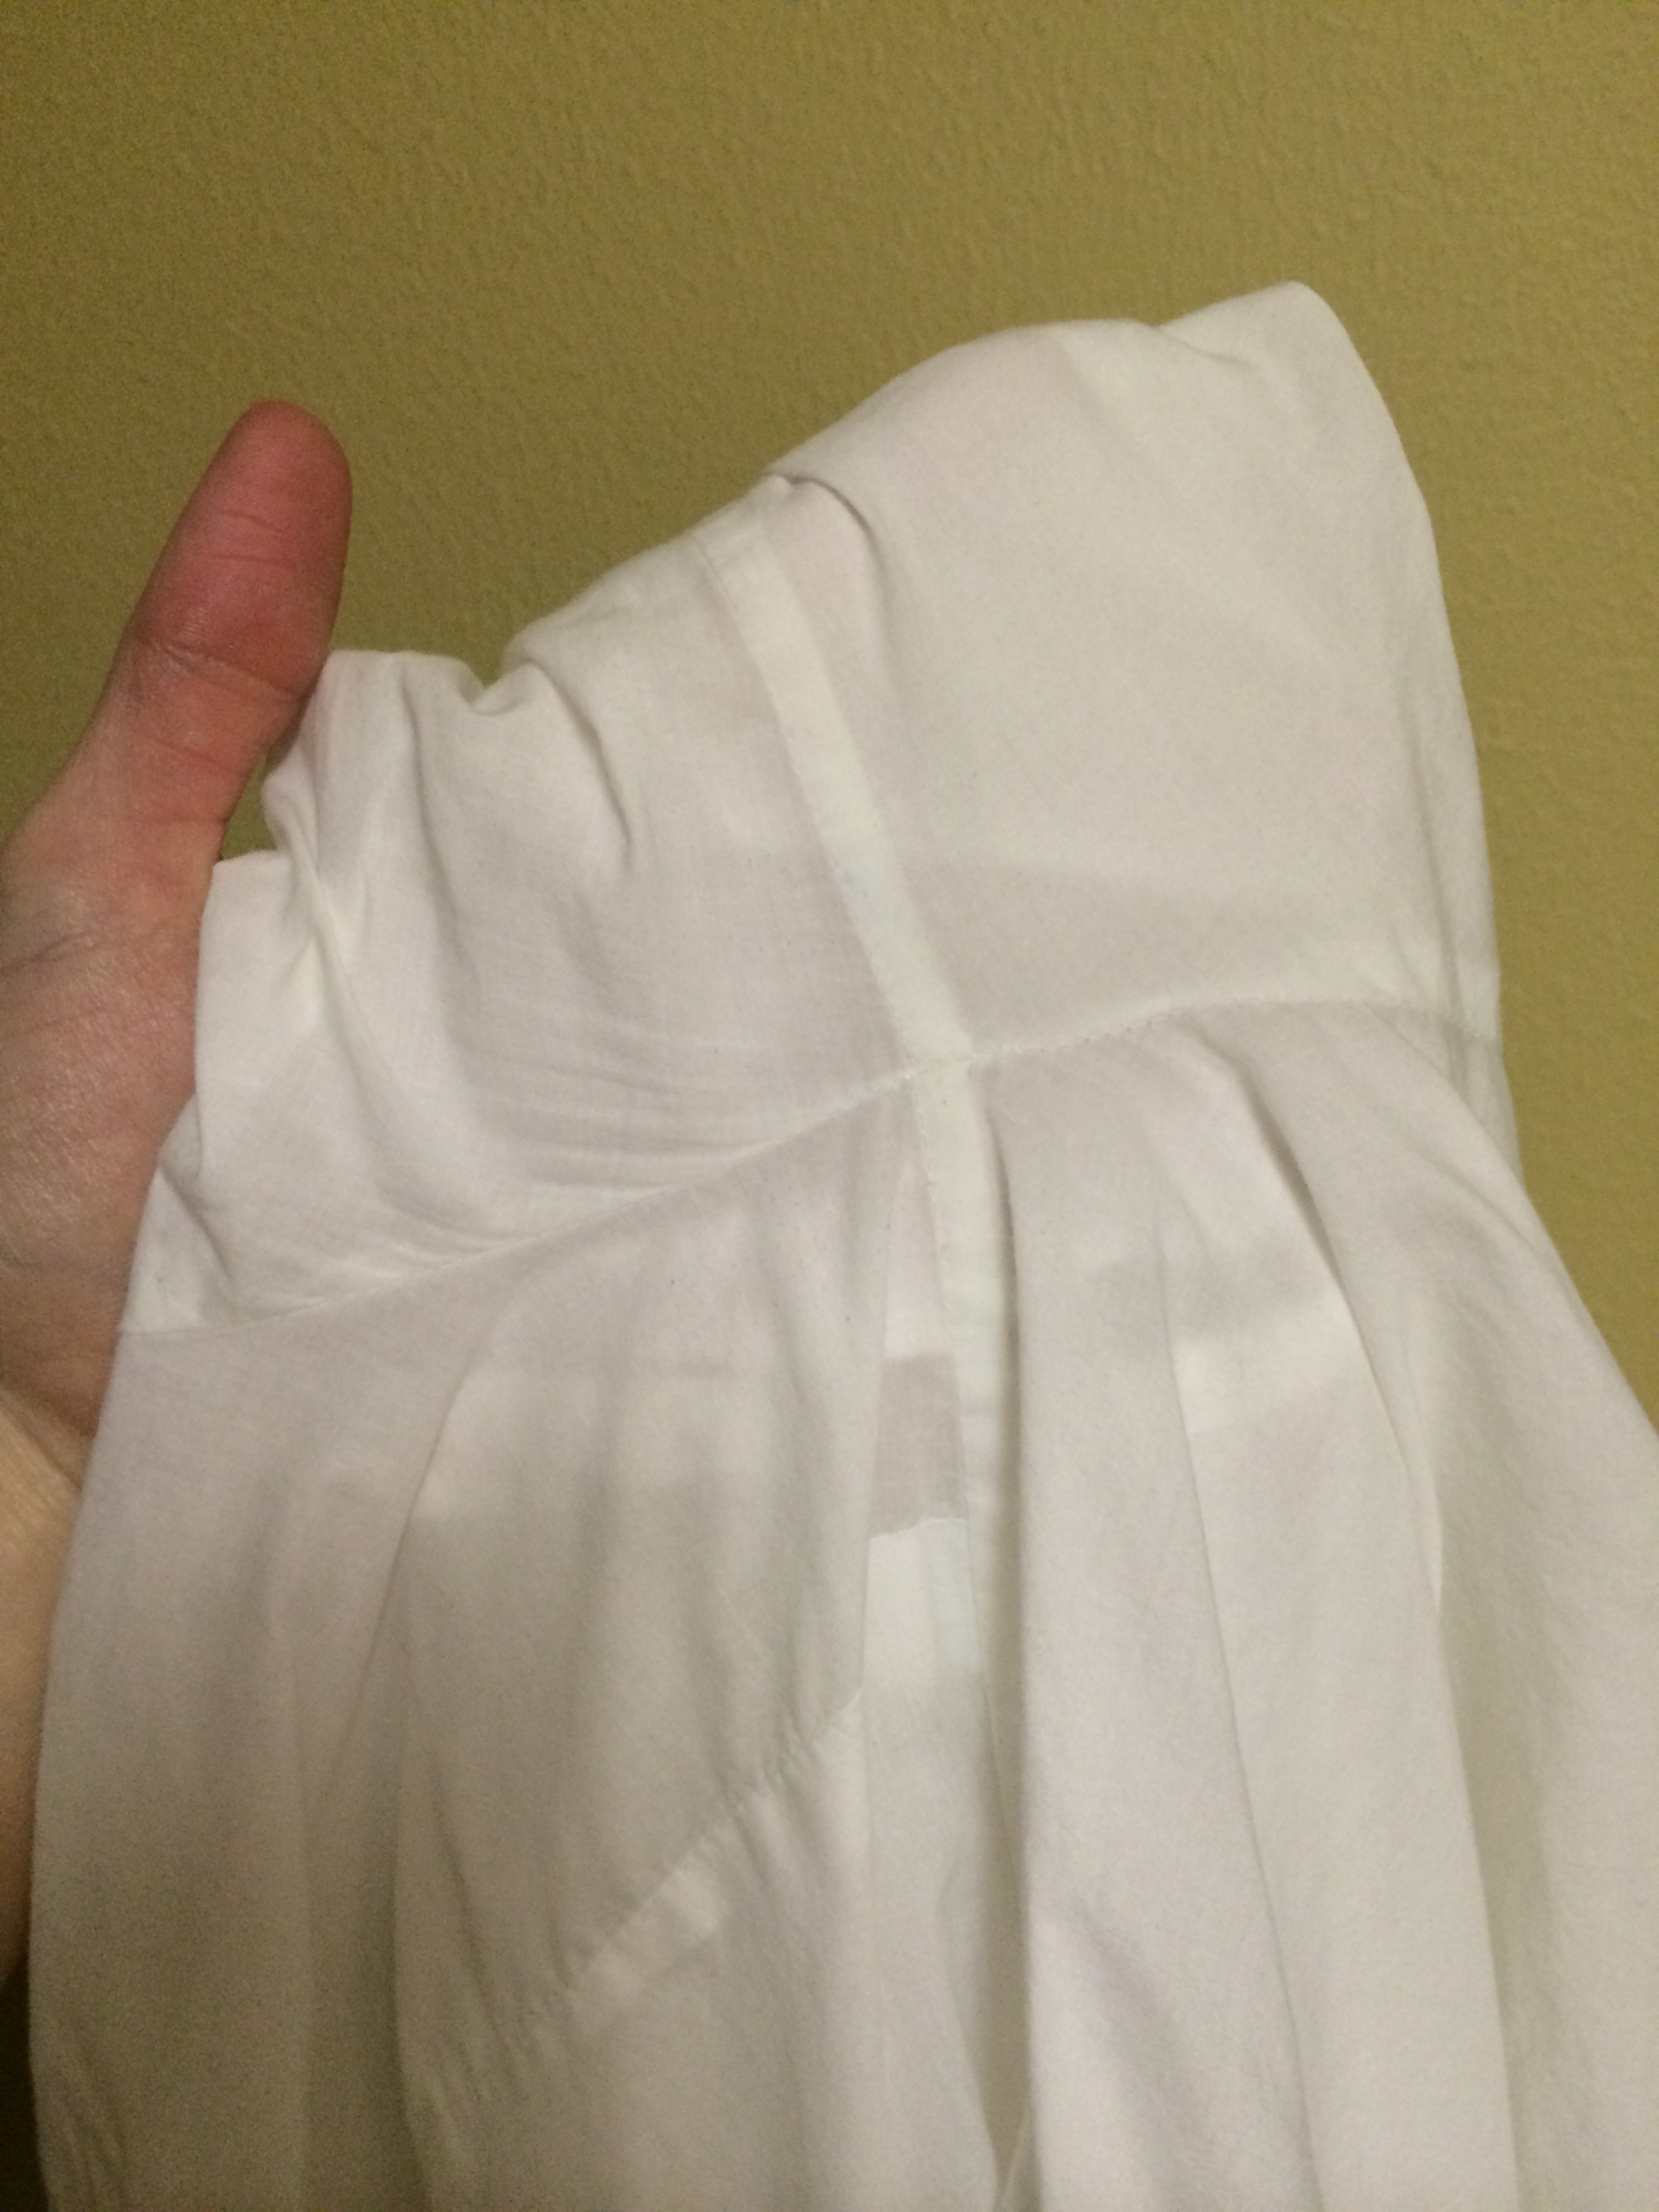
Take the ends of the threads on one side and GENTLY start pulling and gathering the fabric. Be careful not to break the threads or you will have to start over. Gather until you have what is half of your waist size. Now repeat the process on the back. When you have the skirt gathered to your desired waist size, baste the gather (which means stitch it so it does not come undone).

Image

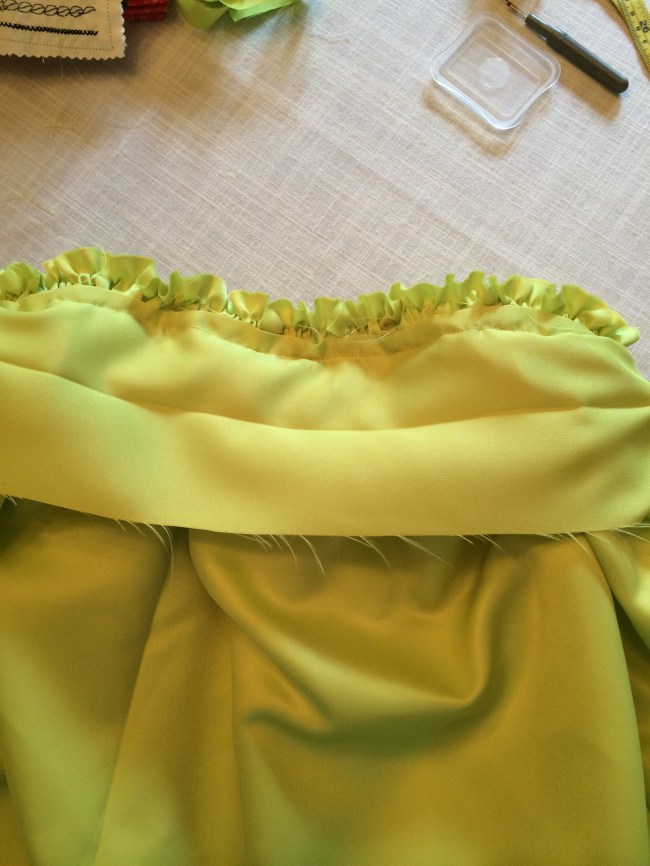
You should now have something that is really starting to look like a skirt. It is time to add a waistband. Take your waist measurement and add an inch for seam allowances. You can make the waistband as thick or thin as you would like, as long as it will be able to fully cover your gathers. If your waist is 30″ and you want your waist band to be 2.5″ thick, cut a rectangle out of your fabric that is 31″ x 5″.

Turn your skirt right side out. Fold your cut out waistband in half so that the 5″ is now 2.5″ (or whatever you made your measurements). Iron to make a nice crease. This will help you later when attaching the waistband. Unfold the waistband and flip it so the correct side is facing the correct side of the skirt. The back side should be facing you. Head to your sewing machine and sew one side of the waistband to your gathered skirt like this:

Image

Fold up your waistband so it looks like this:

Image

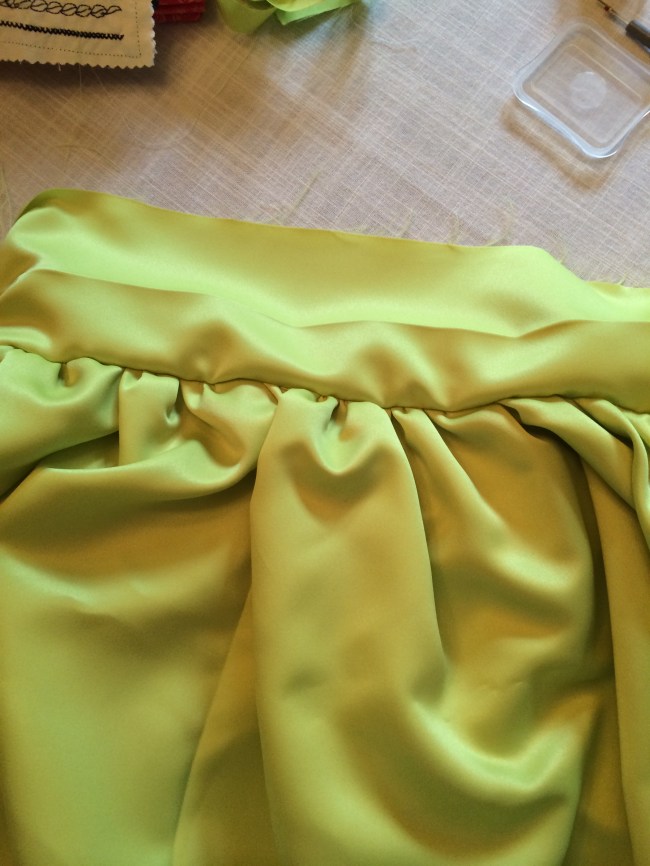
Fold along your ironed crease, enclosing the gathered skirt in the waistband. Fold about 1/4″ of the bottom of the waistband in to prevent fraying and hand sew it to the inside of your skirt using a whipstitch. This way the stitches won’t show through to the front of your skirt.

You are almost finished!

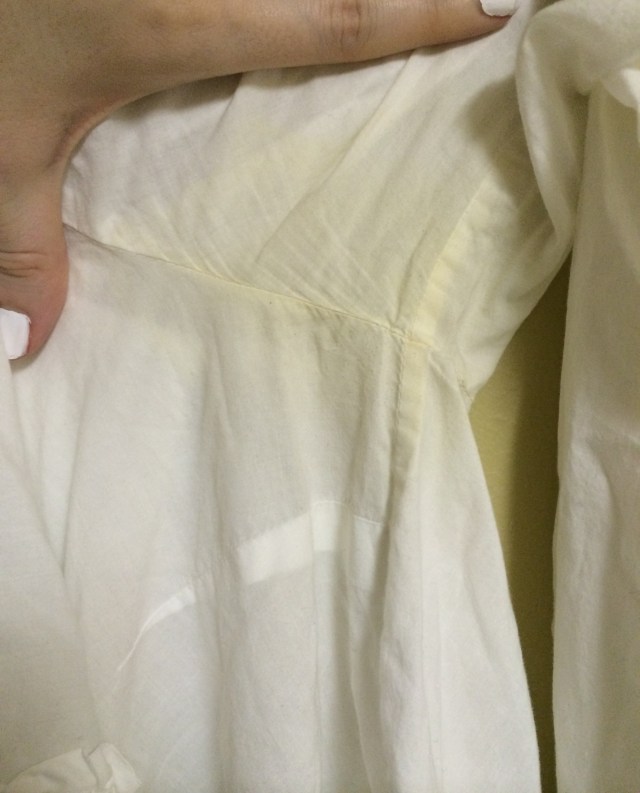
Prepare yourself for inserting the hidden zipper. Just accept that you are NOT stupid if it takes you a while to understand how to attach it. I had to test-run inserting it four or five times before I understood what I was doing. For this you will need a zipper foot for your sewing machine (mine came with one), a good video tutorial, and some patience. But once you do it and it looks beautiful, you will be so proud!

Cut a slit in the back of your skirt where you would like your zipper to be inserted. Cut far enough so that the skirt will fit over your hips when getting into it (the purpose of the zipper). Now watch this video.

Did you do it? Does your zipper look fabulous? Mine did not the first time around, so it is a good idea to practice first. Once you get your zipper installed, attach an eye and hook on your waistband.

All that’s left to do is hem your skirt. Remember, we left a 4″ hem allowance. If you want your hem stitches to be “invisible,” take a look at this video tutorial.

Now trim up any dangling threads, put your skirt on, and give it a twirl!

Image

Mine doesn’t look exactly like the Tibi one I have been coveting, but I was very pleased with the way my first DIY skirt turned out. With some more practice, I am hoping to be able to do more advanced sewing and be able to create a closer version.

Image

|skirt: DIY| |top: ASOS| |shoes; Vince Camuto via Poshmark| |hat: J.Crew (old)|

The Heat is On, Which Means it’s Time for Summer White-Outs

You don’t have to step into a store to notice the all-white trend popping up everywhere. Store front displays and internet shopping sites are chock-full of summer’s keep-cool color. I have to admit I, too, am enchanted by the chicness of an all white ensemble. White looks effortlessly crisp, clean, and fresh, even on the most smoldering of summer days. But let’s face it, keeping an all-white outfit white is not so effortless.

With summer comes an array of ways to soil a perfectly chic ensemble. Added to the ubiquitous red wine mishaps, lipstick smudges, and the kids’ spilled juice, are a whole new batch of stains just waiting to attack your whites. Not-so-clean lawn chairs, dripping ice cream cones and popsicles, and windy al fresco dining are just a few of the occupational hazards of summer.

Other than hiding from your (pick as many as appropriate: kids, boyfriend, husband, cat, dog, sometimes klutzy BFF), or stocking up on Oxi-Clean, there is little we can do to avoid summer’s war on our whites, other than avoid summer.

But I am here to bring you the good news: you CAN get in on this white trend, even if you are the queen of klutz.

Opt for all white accessories to avoid the frustration of walking around wearing your sangria, or with the outline of that patio chair that looks way better on the patio than it does on your back.

To get the look, go for white earrings (I chose vintage clip-ons for my non-pierced ears), a white clutch (I found this Zara one on Poshmark), white framed sunnies (I chose a Chloe pair), and white heels (preferably in patent for easy wipe off). I chose a white-capped toe from Vince Camuto (also found on Poshmark). Add white nails (OPI in Alpine Snow) to complete the ensemble.

All-white accessories pair just as well with denim cutoffs as they do with date-night dresses. You will be right on trend, stress less about getting dirty, and actually enjoy all the fun summer brings!

White Accessories

White Clutch