Love Summer Whites, But Hate Yellow Pits?

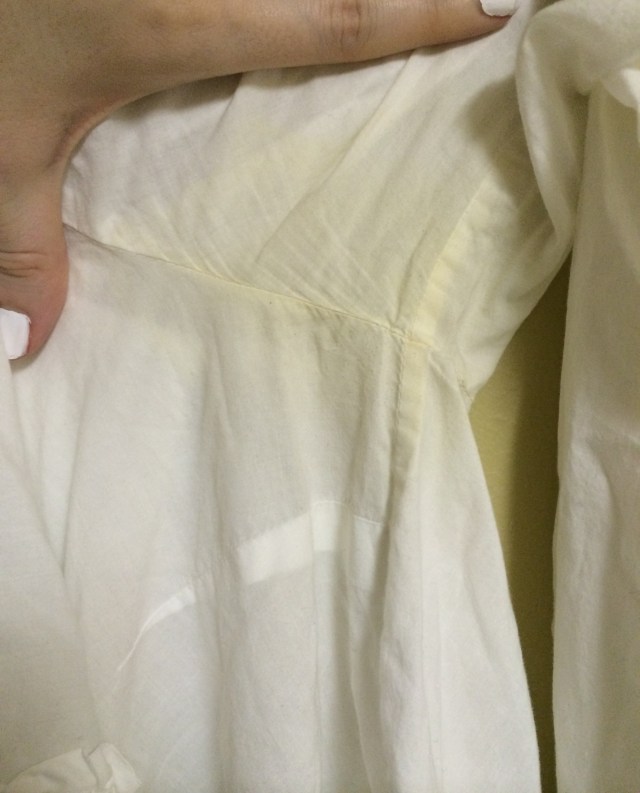
Let’s be honest, we all have a lovely white top or dress somewhere in our closet with a not-so-lovely yellow discoloration under the arms. And let’s be honest, I have way more yellow-armed shirts in my closet than I care to admit. While it may be easy to toss out that old ratty T with the yellow armpits, there are other items that make me cringe to think about tossing out. I fully admit I have put on a top with discolored underarms and thought, “If I just don’t raise my arms the whole night it will be fine, right?”

image-5

After pretreating, washing, pretreating, washing, and so on, I began to think I was going to either have to live with yellow pits, or grit my teeth and toss out all of those discolored whites. But after some research, trial and error, and tweaking others’ recipes, I found a concoction that finally took the yellow out. And the best part, is all the ingredients were already in my house, and probably in yours too. I’m proudly raising my arms, and I just can’t keep what I learned to myself. So if you have shirts that look like this:

(And this isn’t even close to my worst one! This was just the only one I took a picture of for demonstration)

image-3

then read on for how you can save your whites.

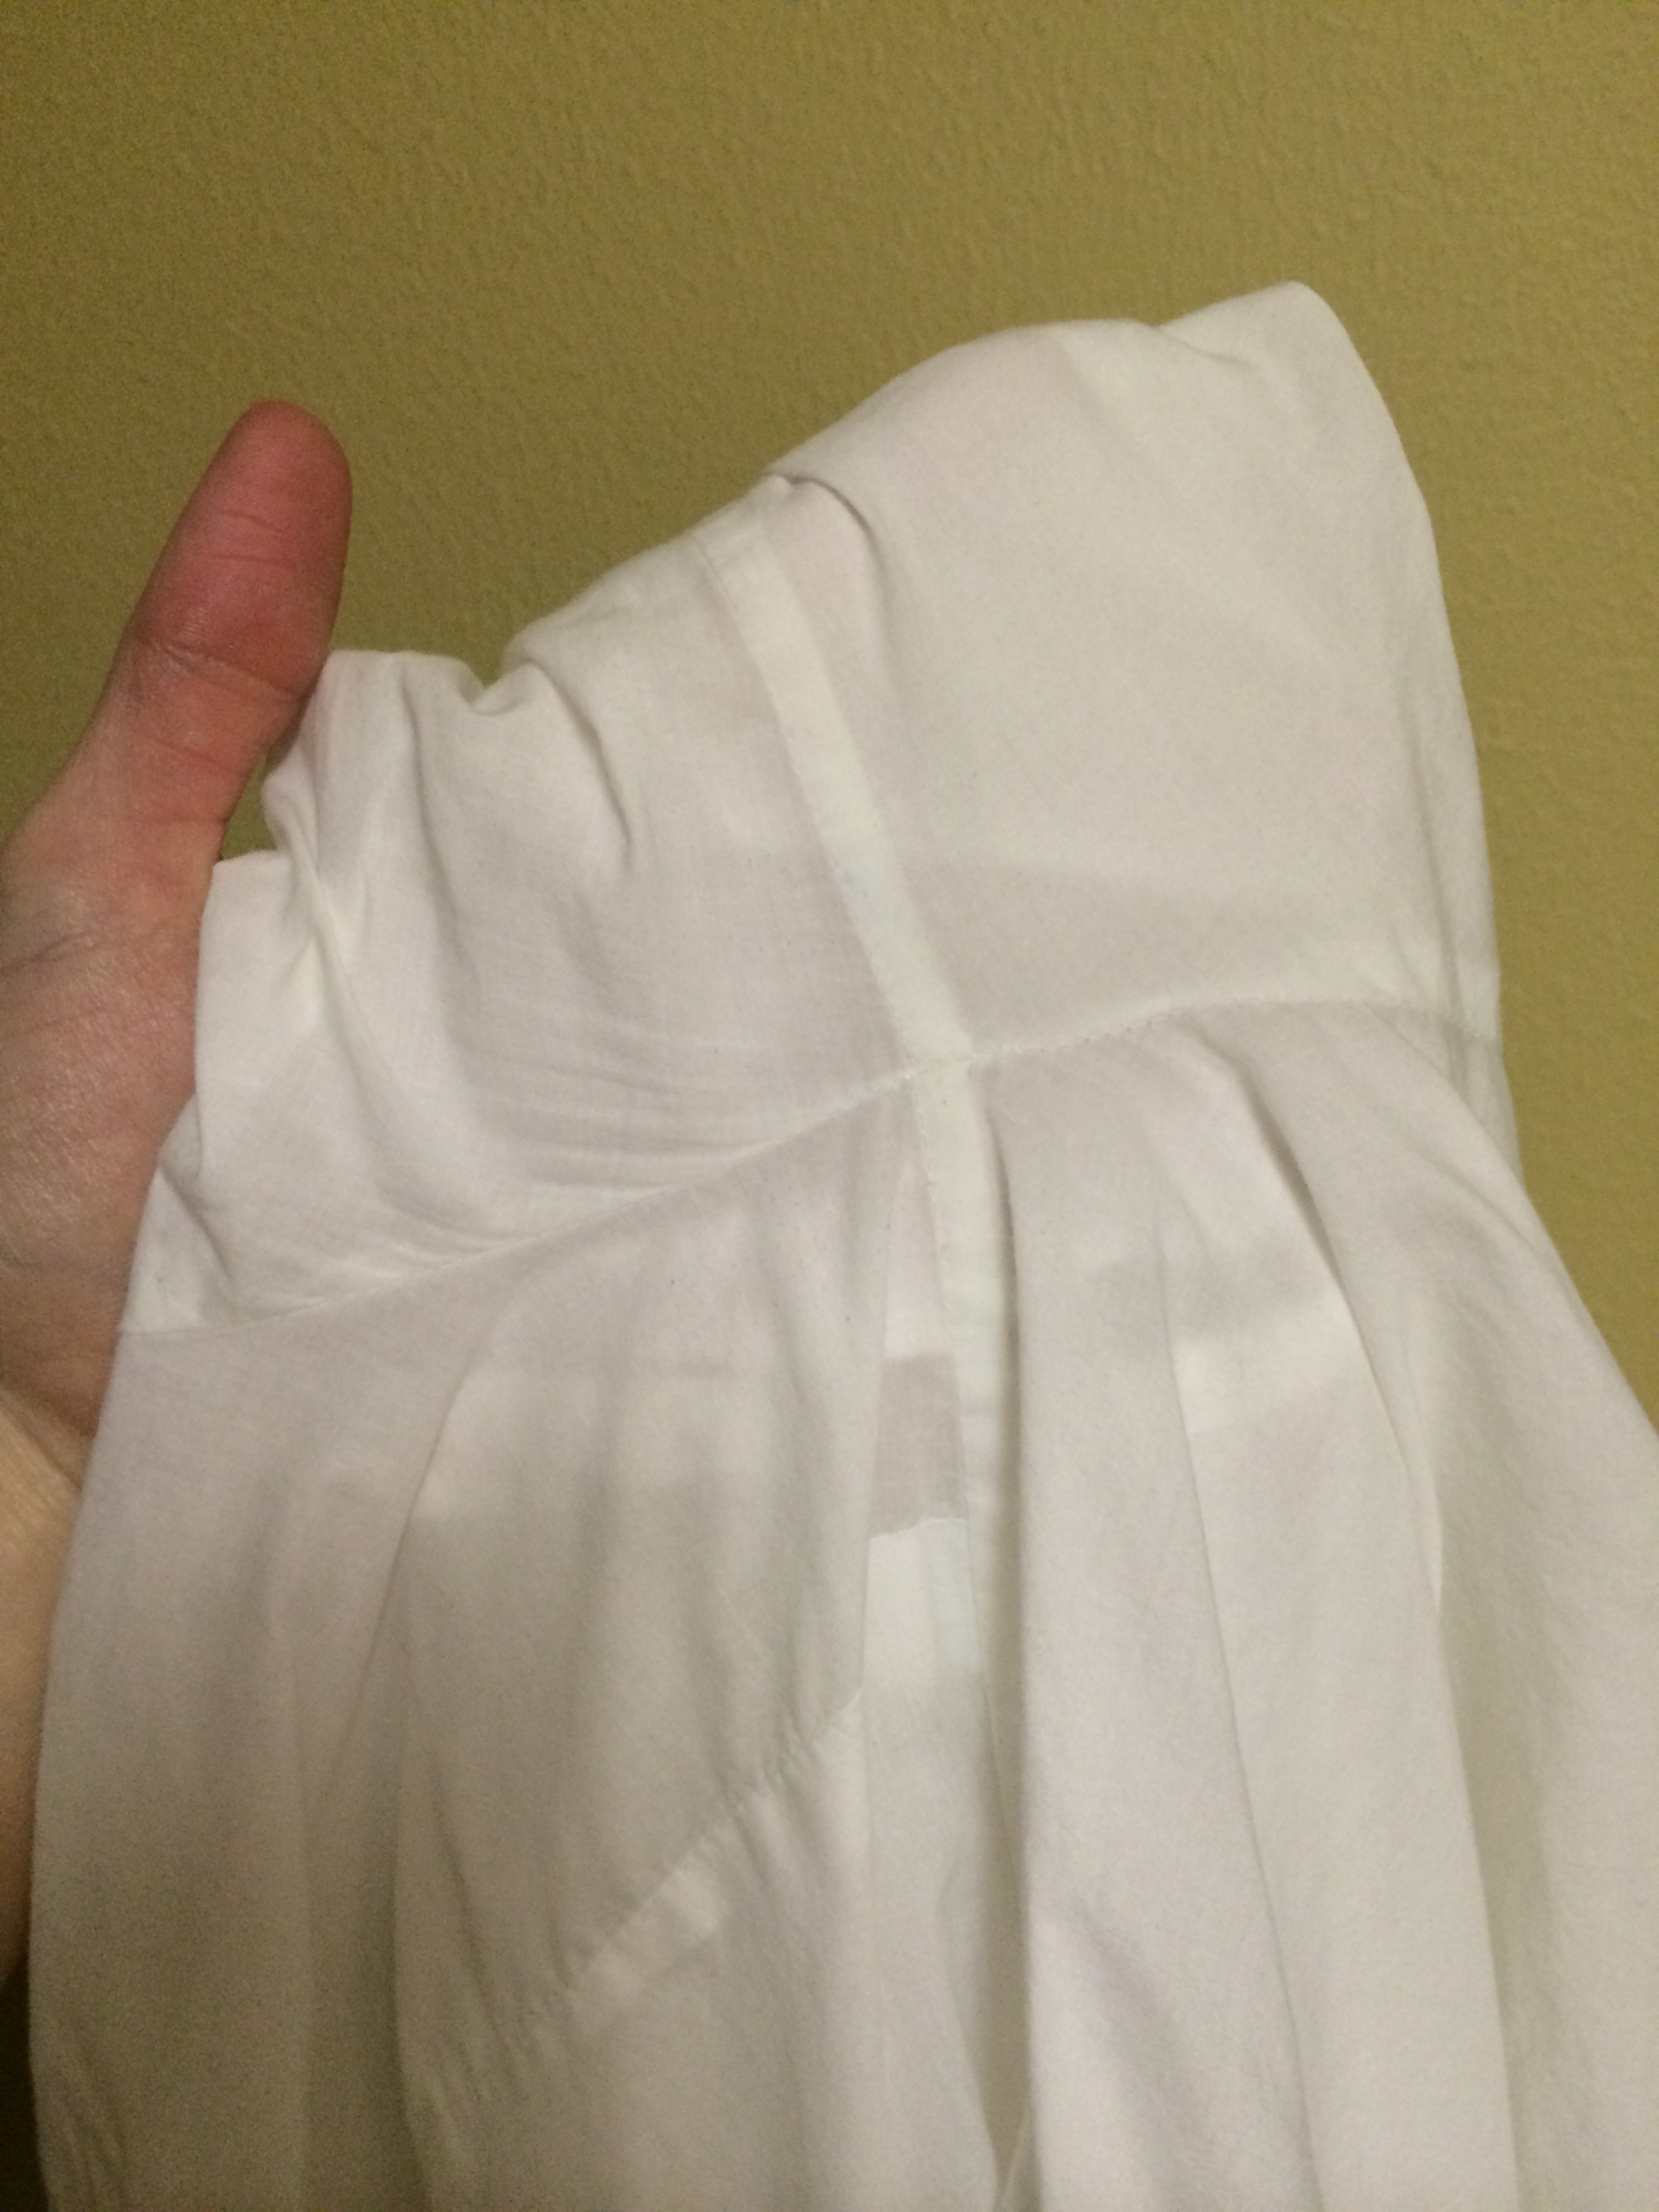
The stains on my shirts are what you would call “set in” stains. Washed and dried several times. I used my technique on cotton (like the shirt above), linen, and silk. My underarm yellow remover worked best on the 100% cotton shirt. It came out right away. The linen sweater was a little more difficult, and the silk was the most difficult because of its delicate nature. But all three shirts came out white in the end. I also successfully used my technique on a dark colored shirt that had salt rings under the arms.

I’m not going to get too in depth on the chemistry behind a yellow pit stain, but there are a few things you should know about why these stains are just so darn stubborn. First off, they are more like discolorations than stains. Unlike dirt, wine spills, and grass stains, for example, that turn your clothes the color of the stain, yellow underarms aren’t from your sweat secreting yellow color (thank God because that would be pretty gross). Your shirts’ underarms turn yellow due to a chemical reaction. This reaction is more difficult to reverse than a typical stain, and thus pretreating and washing is not enough. This is also the reason bleaching your underarms turns them an even worse mustard color yellow. The bleach reacts with your underarm chemicals and minerals to make the stain even worse, even though it fixes other stains on your whites.

Sweat stains are slightly different than the mixture of sweat and deodorant. If you wear deodorant, the yellow under your arms is likely the chemical reaction of the deodorant AND sweat. Ring around the collar, or yellow discoloration elsewhere is most likely due to the chemical reaction of your sweat with the fabric. Sweat stains are slightly easier to remove than the deodorant/sweat combo, but both are just as unsightly and can be removed with this technique.

You will need:

  • Baking Soda
  • Hydrogen Peroxide
  • Liquid Laundry Detergent (preferably a clear one)
  • Warm Water
  • Cup and spoon
  • Your fingers

Spread out the underarm area of your shirt so you can see the full stain. If you have more than one shirt to do like I did, mix 4 Tablespoons of baking soda with 1/4 cup of warm water. If you only have one shirt, you can use less. The mixture is simply equal parts baking soda to warm water.

Stir well. It’s going to seem a bit soupy at first but trust me, it thickens fast. Spoon the mixture onto the underarm and rub it into the fabric well with your fingers. It will start to thicken as you rub. Add more and rub until you have a nice coating covering the discolored area.

Repeat on the other underarm and let sit for about 15-30 minutes. Don’t throw out your mixture.

Come back with your hydrogen peroxide and liquid laundry detergent. I suggest using a clear one because you don’t really need to be adding more color to your underarms. And because we are going to put the detergent directly on the stain, it is gong to be pretty concentrated (way more so than when you put it in a load of wash).

Mix equal parts peroxide and detergent (you can use the same cup as before, even if it has leftover baking soda in it). I used one Tablespoon of each. You are going to rejuvenate the mixture on the underarms by spooning the new concoction over the old and mixing it in with your fingers. The cakey baking soda mixture should become a thick liquid again. Let this new concoction sit for about 15-30 minutes.

When you come back after patiently waiting, don’t be tempted to try to see if it worked yet. You need that nice coating to stay on there. Put the clothes in the wash, but not with another load. They need to be all by themselves. I know it isn’t the most environmentally savvy procedure, but if you do a few shirts at a time it isn’t so bad. Add detergent and wash with warm water if the fabric allows for it. My machine has a “quick wash” setting that is significantly shorter than a typical wash, so I used that.

When the wash cycle is finished take out your shirts and examine the underarms. If they are to your liking, proceed as usual with a dry cycle or hang dry. If they are still a little yellow (like most of mine), repeat the process but on the INSIDE of the underarm.

At first glance it may seem like a lengthy and tedious process. But it’s inexpensive and gets your underarms looking like this:

image-1


image-2

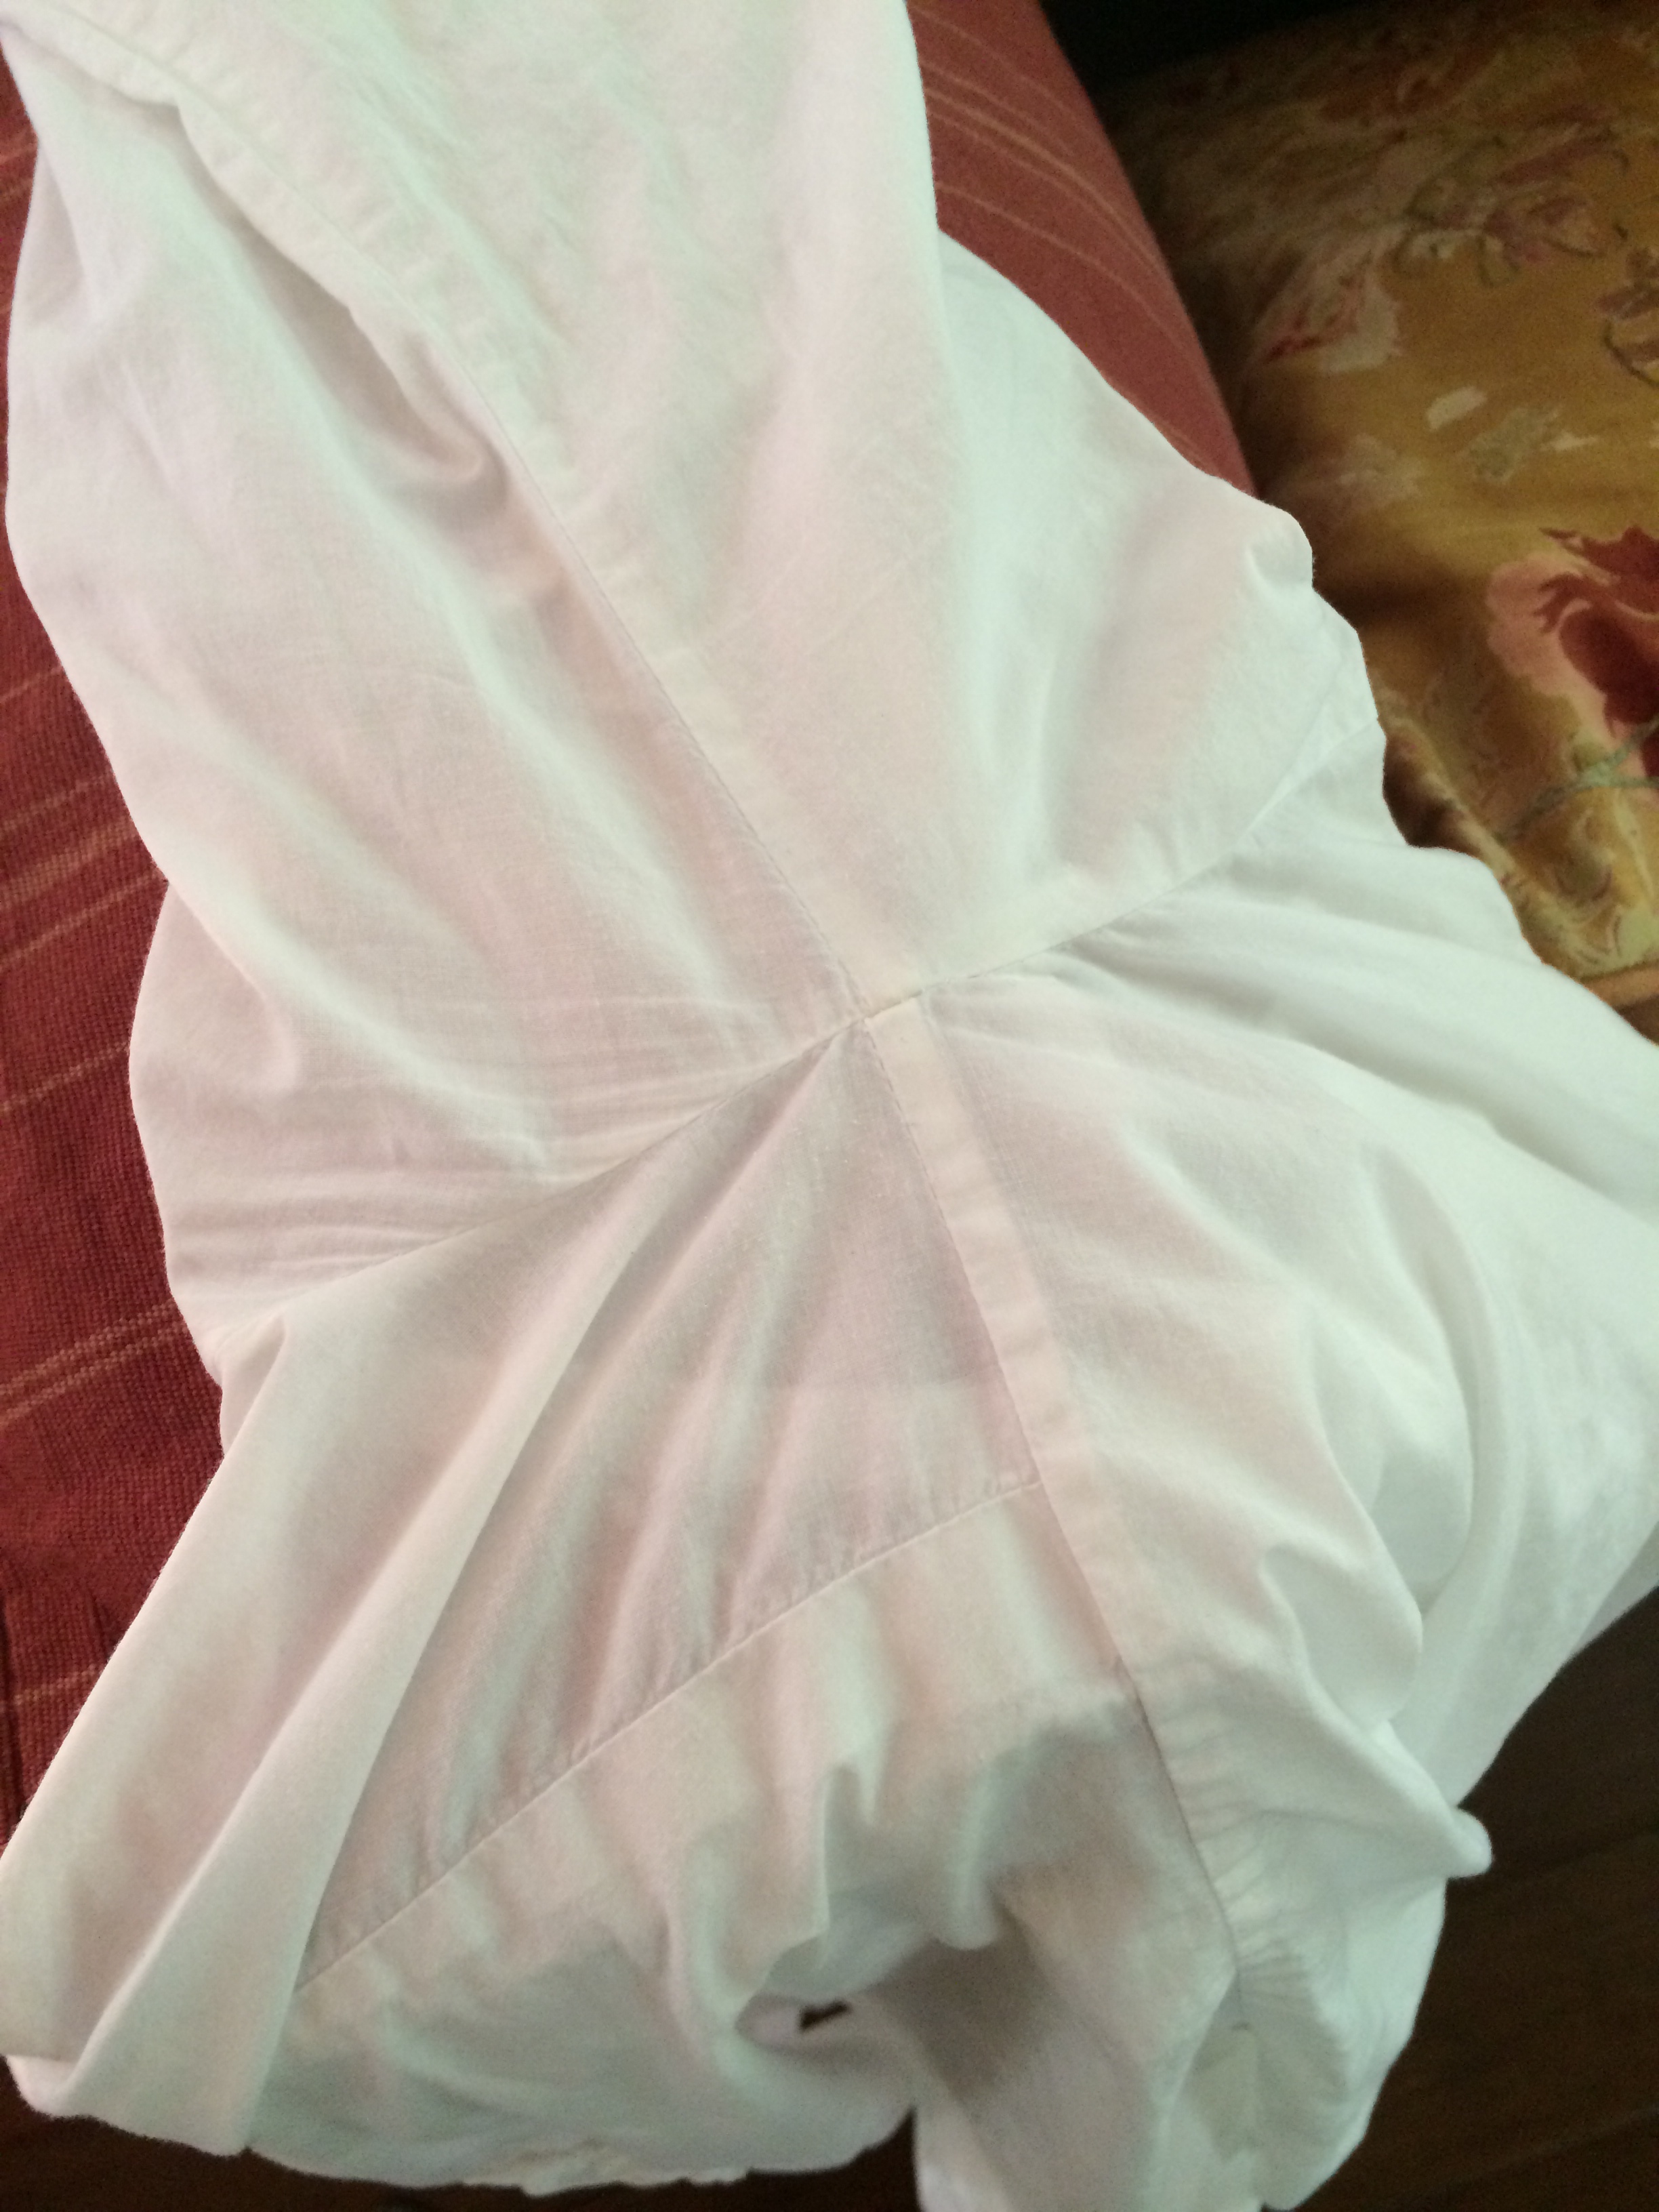
That’s all the motivation I need to use this method over and over again.

image-4

Happy de-yellowing! Go ahead and raise your arms up all summer long. I know I will be.

image-7

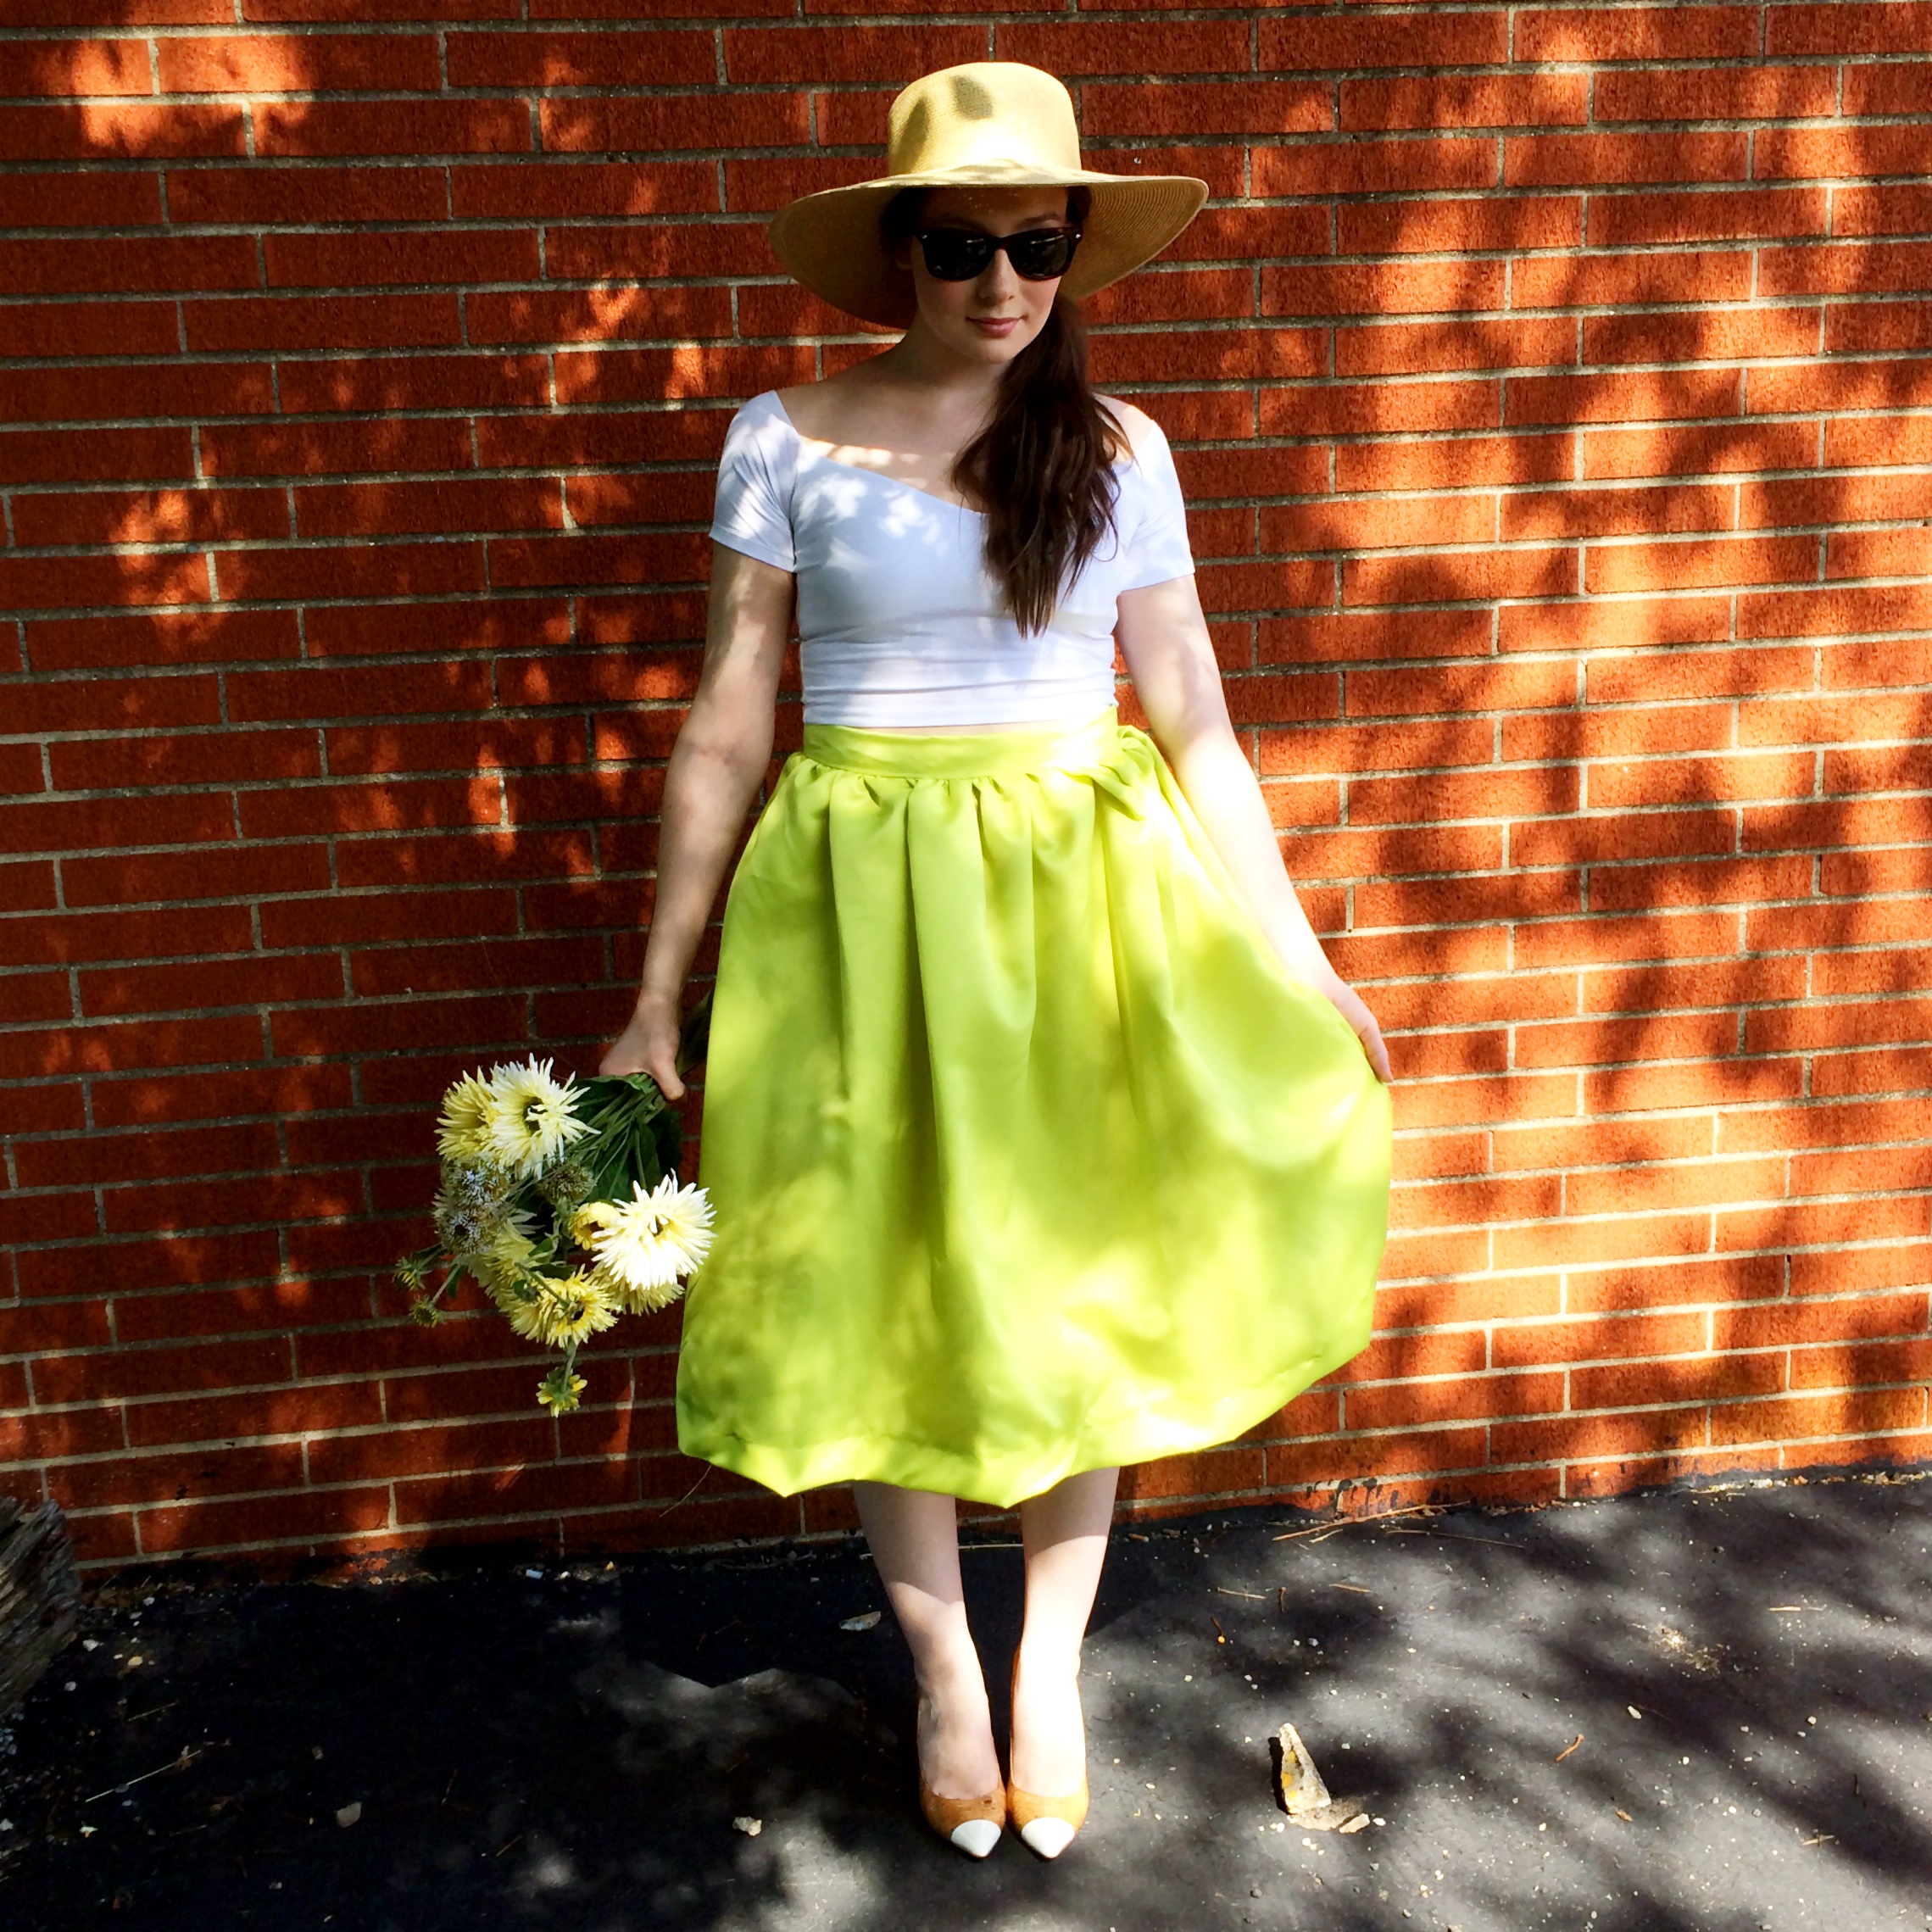
Shown here is a linen summer weight sweater that I treated with my concoction. |sweater: J.Crew (old)| |jeans: Banana Republic (accidentally deconstructed)| |shoes: Steve Madden via Poshmark| |necklace: Ann Taylor Loft| |sunglasses: Marc by Marc Jacobs via Poshmark|


If You Want Something, Do It Yourself

We have all heard from someone, “If you want something done right, you have to do it yourself.”  With limited editions and pricey designer duds, sometimes if we want something at all, we will just have to make it ourselves. This is the story of how a non-sewer created a DIY skirt.

Since the moment I spotted this Tibi skirt on Blair Eadie of Atlantic-Pacific, I knew I had to get my hands on one. The fullness, the length, and that COLOR! But the bright red SOLD OUT text on every site haunted my dreams, as did the $525 price tag. The only way I was going to get my hands on a skirt like that was to make it myself. I love DIY projects, so no problem! Except I know even less than the basics of sewing, and I have used a sewing machine a total of maybe one time. But you never learn if you don’t start, right?

So for those of you who sew, I apologize in advance for my lack of “proper” technique and terms. This one is going out to the newbies as proof that there IS hope of creating a DIY skirt with little or no experience.

Below is Blair Eadie of Atlantic-Pacific in her Tibi Skirt. Read on for how I made a similar version with very little sewing experience.

Image

What you will need:

  • a large ruler or yard stick
  • something to make a pattern (I used computer paper taped together)
  • About 3 yards of fabric (to get fullness I chose a thick material like taffeta. You can use any material you like, but the stiffer the fabric, the more volume you will get from the skirt)
  • thread matching the color of your fabric
  • scissors
  • sewing machine
  • needle
  • pins
  • invisible zipper (preferably in a matching color, but because it is invisible, a close color will work too. I used a cream colored one, which was the best option I could find).
  • eye and hook closure
  • patience
  • possibly a glass of wine (but keep it away from the skirt!!)

One benefit of making your own skirt is you can make it exactly the size and length you want. So first, you are going to measure your waist (or the place you want the waist band of your skirt to be). Then you are going to measure how long you want your skirt to be. I wanted mine to fall below my knees like the Tibi version. That’s about 28″ long on me. For this skirt, I allowed for a four inch hem. The pattern of this skirt is a rectangle that gets gathered at the waist to create a gathered, full skirt. So you are going to want the rectangle’s width to be about two to three times the length of your waist, and the height of the rectangle to be your desired length plus four inches. For example, if your waist is 30″ and you want the length of your skirt to be 28″ long, you are going to need a rectangle that is at least 60″ x 32″. For more fullness, I would suggest more like 75″ x 32″.

Now we need a pattern. I taped computer paper together like this:

Image

Image

Now measure and cut your pattern to your desired size. I made my pattern so that the height was my desired length plus four inches. I wanted my skirt to have two seams on either side so I could insert pockets, so I made the width HALF of my total desired width which was 2.5 times my waist measurement. So for a 30″ waist with a desired length of 28″, the pattern will be about 38″ x 32″.

Take your piece of fabric and lay it down making sure it is nice and smooth. You may need to iron it first. Pin the pattern to your fabric, and cut just outside the line of the pattern (for seam allowances). To avoid heartache later, always make sure you measure twice and cut once. I like to double check my measurements about four times before I cut. If there is one thing you want to redo, it’s measuring, NOT ripping out seams and resewing, or running back to the store for more fabric.

Image

After you cut, you will have the front of your skirt. Now it’s time to cut out the pattern again for the back of your skirt.

If you have a serger and know how to use it, you can serge your edges now to prevent fraying. Otherwise just ignore that statement and we will continue.

It is time to take your two pieces of fabric and head over to the sewing machine. Place your pieces of fabric with the “correct” sides facing each other, and the backsides facing outward. Pin along the sides of the skirt (what will be the waist should be at the top). Now sew the sides of the skirt, making sure you backstitch on both ends to secure the stitch. You should now have the front and back of the skirt sewn together at what will be the sides of your skirt. Now to gather your waist.

I like to do the front half and back half separately. To gather, make two rows of long stitches near the top of your fabric. It will look something like this…

Image

Take the ends of the threads on one side and GENTLY start pulling and gathering the fabric. Be careful not to break the threads or you will have to start over. Gather until you have what is half of your waist size. Now repeat the process on the back. When you have the skirt gathered to your desired waist size, baste the gather (which means stitch it so it does not come undone).

Image

You should now have something that is really starting to look like a skirt. It is time to add a waistband. Take your waist measurement and add an inch for seam allowances. You can make the waistband as thick or thin as you would like, as long as it will be able to fully cover your gathers. If your waist is 30″ and you want your waist band to be 2.5″ thick, cut a rectangle out of your fabric that is 31″ x 5″.

Turn your skirt right side out. Fold your cut out waistband in half so that the 5″ is now 2.5″ (or whatever you made your measurements). Iron to make a nice crease. This will help you later when attaching the waistband. Unfold the waistband and flip it so the correct side is facing the correct side of the skirt. The back side should be facing you. Head to your sewing machine and sew one side of the waistband to your gathered skirt like this:

Image

Fold up your waistband so it looks like this:

Image

Fold along your ironed crease, enclosing the gathered skirt in the waistband. Fold about 1/4″ of the bottom of the waistband in to prevent fraying and hand sew it to the inside of your skirt using a whipstitch. This way the stitches won’t show through to the front of your skirt.

You are almost finished!

Prepare yourself for inserting the hidden zipper. Just accept that you are NOT stupid if it takes you a while to understand how to attach it. I had to test-run inserting it four or five times before I understood what I was doing. For this you will need a zipper foot for your sewing machine (mine came with one), a good video tutorial, and some patience. But once you do it and it looks beautiful, you will be so proud!

Cut a slit in the back of your skirt where you would like your zipper to be inserted. Cut far enough so that the skirt will fit over your hips when getting into it (the purpose of the zipper). Now watch this video.

Did you do it? Does your zipper look fabulous? Mine did not the first time around, so it is a good idea to practice first. Once you get your zipper installed, attach an eye and hook on your waistband.

All that’s left to do is hem your skirt. Remember, we left a 4″ hem allowance. If you want your hem stitches to be “invisible,” take a look at this video tutorial.

Now trim up any dangling threads, put your skirt on, and give it a twirl!

Image

Mine doesn’t look exactly like the Tibi one I have been coveting, but I was very pleased with the way my first DIY skirt turned out. With some more practice, I am hoping to be able to do more advanced sewing and be able to create a closer version.

Image

|skirt: DIY| |top: ASOS| |shoes; Vince Camuto via Poshmark| |hat: J.Crew (old)|